Onboarding Process Tutorial 5: Configuring Subprocess
Introduction
As business processes grow more complex, the need for modular and scalable workflow design becomes essential. Hyperion Edition meets this challenge with its support for Subprocesses in BPMN, allowing users to group related tasks into self-contained units for better organization and reuse. These subprocesses can be configured for parallel or sequential execution, giving users full control over how tasks are handled within each block. Whether tasks need to run simultaneously to save time or in a strict order to maintain dependencies, this flexibility ensures that processes are both efficient and logically sound.
Subprocess
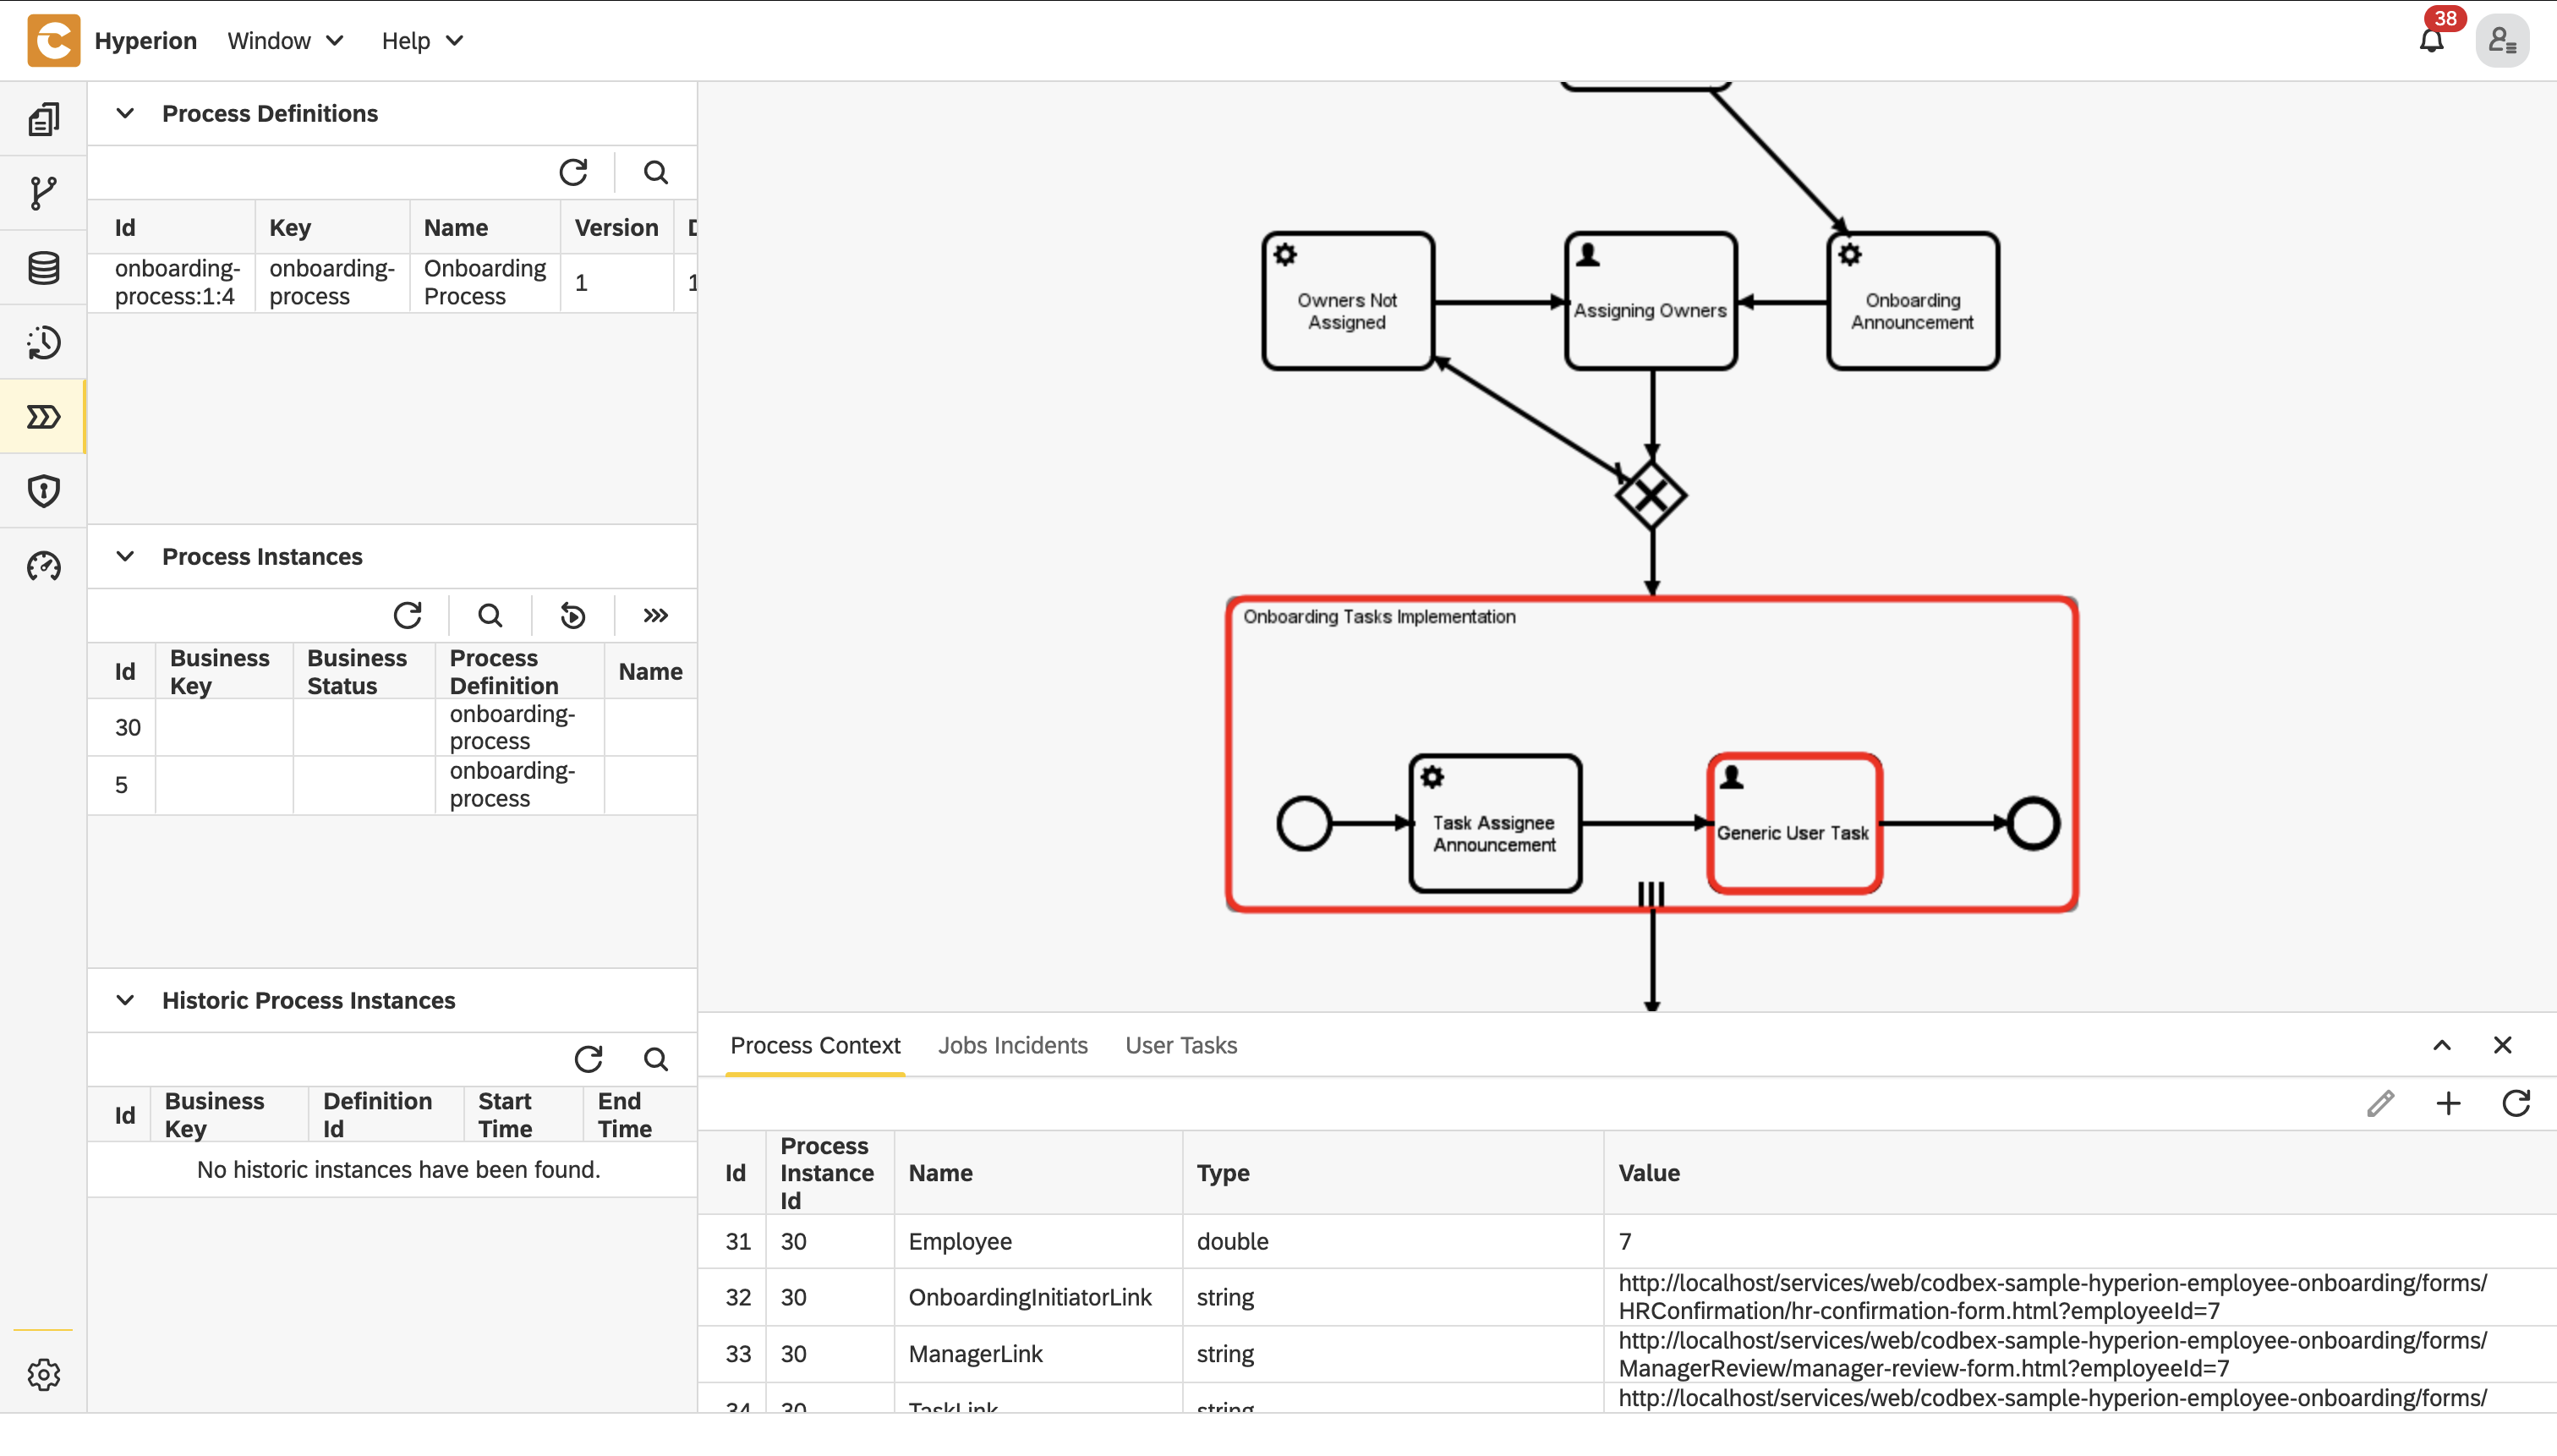
To incorporate the onboarding task created by the first service - Document Generation, a subprocess can be used. It will notify the assignees via email and wait for them to complete their forms. The mail for each assignee should send at the same time and the subprocess should wait all of the forms to be fullfiled before continuing the executions. That would be accomplished by having a parallel execution of the tasks in the subprocess
Subprocess definition
- Open the BPMN file
- Disconnect the end event of the logical gateway
- From Structural grab a Sub process and place it in the diagram field
- Connect the end of the logical gateway to the subprocess
- Connect the subprocess to the end event
Subprocess configuration
To make the subprocess execution parallel there needs to be a variable holding the employees fow which we want the services in the subprocess to execute. The subprocess esentially iterates this array variable. We've created this variable in the Manager Review form, so it's already in the execution context.
- Click on the subprocess
- In the Id field type
onboarding-tasks-implementation - In the Name field type
Onboarding Tasks Implementation - In the Multi-instance type field choose
Parallel - In the Collection (Multi-instance) field type $
{TaskAssignees} - In the Element variable (Multi-instance) field type $
task. This will be the current element of the array in the iteration.
Subprocess tasks
There needs to be a service task to send emails to the assignees and a user task to wait for it's coresponding form to be fullfiled.
- Add a start event to the subprocess
- Add a service task and connect the start event to it
- Add a user task and connect the service task to it
- Add an end event and connect the user task to it
Notifying Assignees
Service task configuration
- Click on the service task in the subprocess to open its properties
- In the Id field type
task-assignee-announcement - In the Name field type
Task Assignee Announcement - In the Delegate Expression field type
${JSTask} - Click on the Class field → the + button to add handler entry
- In the Name field type
handler - In the String value field type the link to the task definition
codbex-sample-hyperion-employee-onboarding/tasks/task-assignee-announcement.ts
Service task definition
- In the tasks folder create a file called
task-assignee-announcement.ts - Paste the following code in the file
📄 View code
import { EmployeeRepository as EmployeeDao } from "codbex-sample-hyperion-employee-onboarding/gen/codbex-sample-hyperion-employee-onboarding/dao/Employee/EmployeeRepository";
import { DepartmentRepository as DepartmentDao } from "codbex-sample-hyperion-employee-onboarding/gen/codbex-sample-hyperion-employee-onboarding/dao/Department/DepartmentRepository";

import { process } from "sdk/bpm";
import { sendMail } from "./mail-util";

const employeeDao = new EmployeeDao();
const departmentDao = new DepartmentDao();

const execution = process.getExecutionContext();
const executionId = execution.getId();
const processInstanceId = execution.getProcessInstanceId();

const task = process.getVariable(executionId, "task");
const employeeId = process.getVariable(executionId, "Employee");

const newHire = employeeDao.findById(employeeId);
if (!newHire) {
  throw new Error(`Employee with ID ${employeeId} not found!`);
}

const employee = employeeDao.findById(task.Assignee);
if (!employee) {
  throw new Error(`Employee with ID ${task.Assignee} not found!`);
}

const departmentName = departmentDao.findById(newHire.Department).Name;

const subject = task.Name;
console.log("Subject: ", subject);

const finalLink = `${task.Link}&processId=${processInstanceId}`;

const content = `
  <div style="font-family: Arial, sans-serif; line-height: 1.6; color: #333; max-width: 600px; margin: auto; padding: 20px; border: 1px solid #ddd; border-radius: 10px;">
    <div style="text-align: left; margin-bottom: 20px;">
      <img src="https://raw.githubusercontent.com/codbex/codbex.github.io/main/docs/images/logos/codbex-logo.png" alt="Company Logo" style="width: 50px; height: 50px;">
    </div>
    <h2 style="color: #2c3e50; text-align: center;">New Onboarding Task Assigned</h2>
    <p>Dear ${employee.Name},</p>
    <p>You have been assigned a new onboarding task related to <strong>${newHire.Name}</strong> (Department: <strong>${departmentName}</strong>).</p>
    <p>Please click the button below to access your inbox and complete the required steps:</p>
    <div style="text-align: center; margin: 20px 0;">
      <a href="${finalLink}" target="_blank" style="
        display: inline-block;
        padding: 12px 24px;
        font-size: 16px;
        color: #fff;
        background-color: #007bff;
        text-decoration: none;
        border-radius: 5px;
      ">Fulfill Task</a>
    </div>
    <p style="text-align: center; font-size: 14px; color: #555;">
      Alternatively, you can access it here:
      <a href="${finalLink}" target="_blank" style="color: #007bff; text-decoration: underline;">
        Fulfill Your Onboarding Task
      </a>
    </p>
    <p>If you have any questions or need support, please contact the HR team.</p>
    <p>Best regards.</p>
  </div>
`;

sendMail(employee.Email, subject, content);
💡 Note
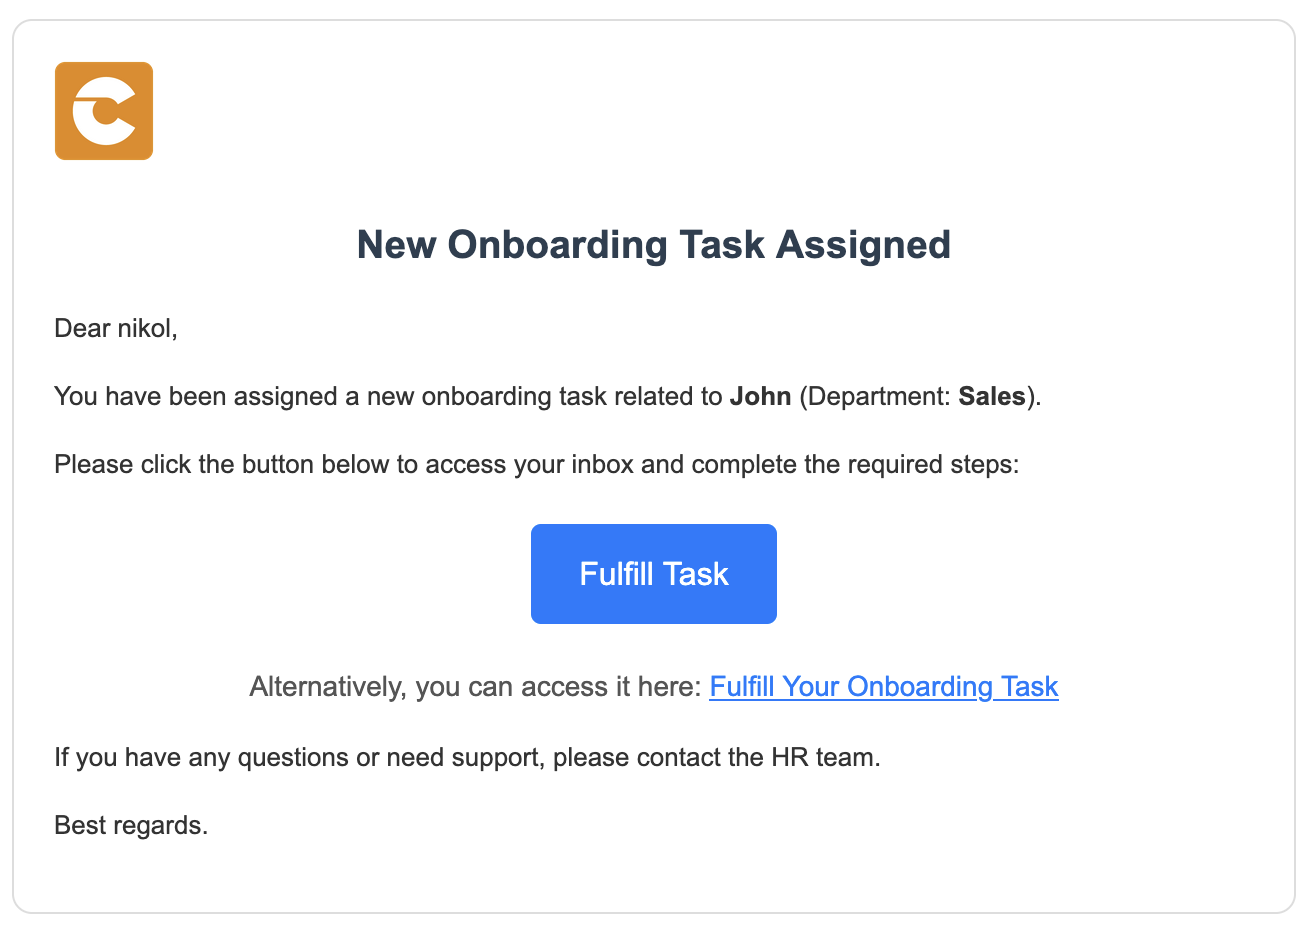
This script sends a notification email to an employee when they are assigned a new onboarding task related to a recently hired colleague. It
retrieves the task, new hire, and assignee details from the BPM process and the database, constructs a professional HTML email containing task information and a direct link to the task page, and sends it using a mail utility. The email prompts the assignee to take action promptly to support the onboarding process.
Assignee User Task
To not create a separate form for each assignee a single form and user task will be used.
User task configuration
- In the Id field type
generic-user-task - In the Name field type
Generic User Task
Assignee form
Inside the
formsfolder, create another folder namedTaskCompletion.Within the
formsfolder, create a new file namedtask-completion-form.htmland place the required code inside it.
📄 View code
<!DOCTYPE html>
<html lang="en" xmlns="http://www.w3.org/1999/xhtml" ng-app="templateApp" ng-controller="templateController">
<head>
<meta charset="utf-8" />
<meta name="viewport" content="width=device-width, initial-scale=1">
<link rel="icon" sizes="any" href="data:;base64,iVBORw0KGgo=">
<title dg-view-title></title>
<script type="text/javascript" src="task-completion-generate.js"></script>
<script type="text/javascript" src="/services/js/platform-core/services/loader.js?id=view-js"></script>
<link type="text/css" rel="stylesheet" href="/services/js/platform-core/services/loader.js?id=view-css" />
<script src="task-completion-form-controller.js">
</script>
</head>
<body class="bk-vbox">
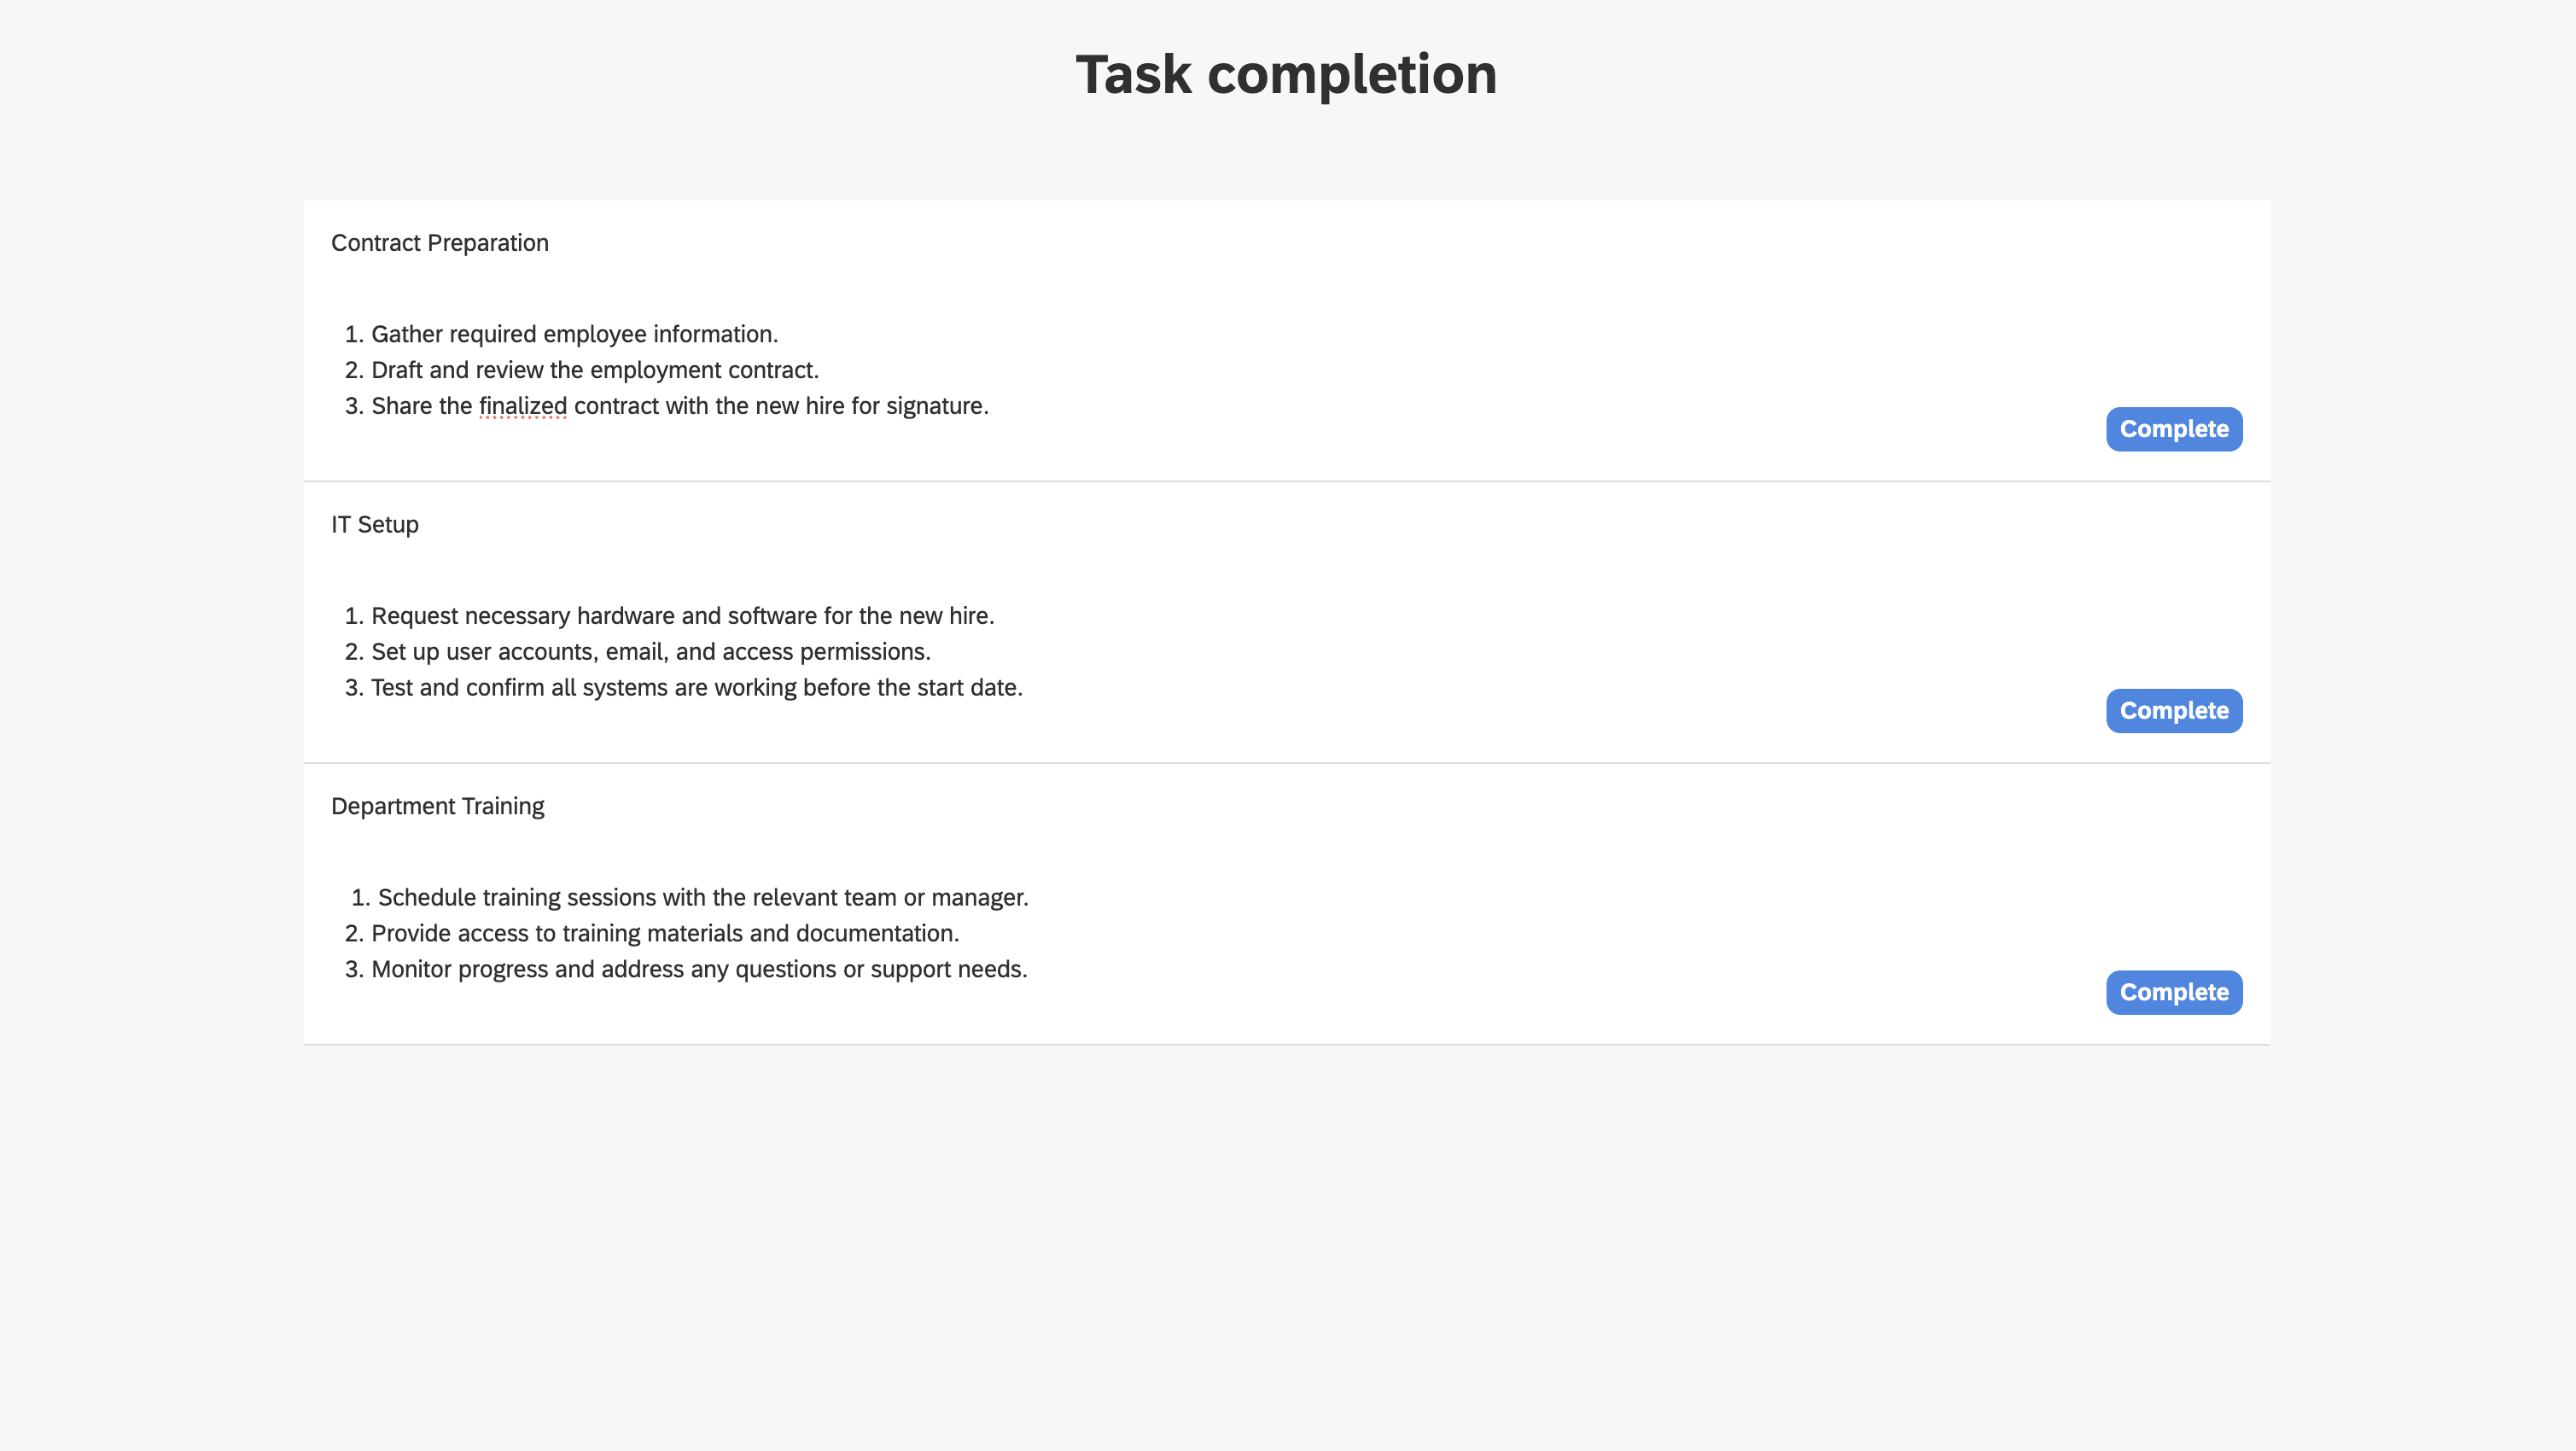
<h2 bk-title class="bk-padding--md bk-center" wrap="true" header-size="2" aria-label="title" ng-if="!completed"> Task completion</h2>
<bk-scrollbar class="bk-full-height bk-padding--sm bk-center--horizontal">
<bk-message-page glyph="sap-icon--message-information" ng-if="completed">
<bk-message-page-title>All Employee Tasks Have Been Completed!</bk-message-page-title>
<bk-message-page-subtitle>Great job! Every task in the list has been successfully completed.
</bk-message-page-subtitle>
</bk-message-page>
<bk-panel ng-if="!completed" expanded="true" compact="true" style="max-width: 80%;" class=" bk-full-width">
<bk-panel-content aria-label="Panel Content">
<bk-list byline="true">
<bk-list-item ng-repeat="next in taskList">
<bk-list-content item-title="{{ next.Name }}">
<bk-list-byline align="left">
<bk-textarea style="height: 100px; max-width: 100%" class="bk-no-border">
{{ next.Description }}
</bk-textarea>
</bk-list-byline>
<bk-list-byline align="right">
<bk-button ng-if="!next.isCompleted" label="Complete" state="emphasized" ng-click="completeTask(next)">
</bk-button>
</bk-list-byline>
</bk-list-content>
</bk-list-item>
</bk-list>
</bk-panel-content>
</bk-panel>
</bk-scrollbar>
<theme></theme>
</body>
</html>💡 Note
This is the HTML layout of the view. It includes a form
that must be filled out to complete onboarding tasks.
- Within the
formsfolder, create a new file namedtask-completion-form-controller.jsand place the required code inside it.
📄 View code
angular.module('templateApp', ['blimpKit', 'platformView']).controller('templateController', ($scope, $http) => {

    $scope.entity = {};
    $scope.forms = {
        details: {},
    };

    const employeeId = new URLSearchParams(window.location.search).get('employeeId');
    const processInstanceId = new URLSearchParams(window.location.search).get('processId');

    const tasksUrl =
        "/services/ts/codbex-sample-hyperion-employee-onboarding/forms/TaskCompletion/api/TaskCompletionFormService.ts/tasksData/" + employeeId;
    const completeTaskUrl =
        "/services/ts/codbex-sample-hyperion-employee-onboarding/forms/TaskCompletion/api/TaskCompletionFormService.ts/completeTask/" + processInstanceId;

    $http.get(tasksUrl)
        .then(response => {
            $scope.taskList = response.data;
            $scope.completed = response.data.length === 0;
        })
        .catch((error) => {
            console.error("Error getting task data: ", error);
        });

    $scope.completeTask = (task) => {
        $http.post(completeTaskUrl, task)
            .then(response => {
                console.log("Task updated successfully", task.Id, response.data);
                return $http.get(tasksUrl);
            })
            .then(response => {
                $scope.taskList = response.data;
                $scope.completed = response.data.length === 0;
            })
            .catch((error) => {
                console.error("Error completing or refreshing task", error);
            });
    };
});
💡 Note
The controller acts as an intermediary between the frontend and the backend. It receives data from the frontend, then passes it to a TypeScript service. The service, in turn, processes the data and interacts with the database to fetch or manipulate the required information.
- Inside the
formsfolder, create a new folder namedapi, then create a file calledTaskCompletionFormService.tswithin it. Place the following code inside this file
📄 View code
import { OnboardingTaskRepository as OnboardingTaskDao } from "codbex-sample-hyperion-employee-onboarding/gen/codbex-sample-hyperion-employee-onboarding/dao/OnboardingTask/OnboardingTaskRepository";
import { EmployeeRepository as EmployeeDao } from "codbex-sample-hyperion-employee-onboarding/gen/codbex-sample-hyperion-employee-onboarding/dao/Employee/EmployeeRepository";

import { Controller, Get, Post } from "sdk/http";
import { user } from "sdk/security";
import { tasks } from "sdk/bpm";

@Controller
class TaskCompletionFormService {

    private readonly onboardingTaskDao;
    private readonly employeeDao;

    constructor() {
        this.onboardingTaskDao = new OnboardingTaskDao();
        this.employeeDao = new EmployeeDao();
    }

    @Get("/tasksData/:employeeId")
    public tasksData(_: any, ctx: any) {
        const employeeId = ctx.pathParameters.employeeId;

        const users = this.employeeDao.findAll({
            $filter: {
                equals: {
                    Email: user.getName()
                }
            }
        });

        const tasks = this.onboardingTaskDao.findAll({
            $filter: {
                equals: {
                    Employee: employeeId,
                    Status: 2,
                    Assignee: users[0].Id
                }
            }
        });

        return tasks;
    }

    @Post("/completeTask/:processInstanceId")
    public completeTask(body: any, ctx: any) {
        const processInstanceId = ctx.pathParameters.processInstanceId;

        const processTask = tasks.list().filter(task => task.data.processInstanceId === processInstanceId);

        let task = this.onboardingTaskDao.findById(body.Id);
        task.Status = 3;
        this.onboardingTaskDao.update(task);

        tasks.complete(processTask[0].data.id);
    }
}
💡 Note
This service handles communication with the database. It processes the data passed from the controller and interacts with the database to perform the necessary operations, such as fetching, inserting, or updating records.
Test BPMN Process
- Go to the Dashboard of the application at http://localhost/services/web/dashboard/ → Click the New Hire Navigation
- Enter the details of the new hire
- After some time the tasks of the onboarding process will be created. To view them go to the Dashboard of the application at http://localhost/services/web/dashboard/ → Click the Onboarding Tasks Navigation
- Check the email of the manager and click on the button from there
- If you check the Process Workspace you'll see that the process has stop at the user task and waits for it to be completed
- After that complete the form by assigning employees to the tasks.
- All the employees should recieve an email
- If you check the Process Workspace you'll see that the process has stop at the subprocess
- Now click on the button from a mail send to an assignee to open the form and complete the task
Other blogs
- Onboarding Process Tutorial 1: EDM Configuration
- Onboarding Process Tutorial 2: BPMN Configuration - Service Task Definition
- Onboarding Process Tutorial 3: SMTP Connection
- Onboarding Process Tutorial 4: User Task Definition and Logical Gateways
- Onboarding Process Tutorial 5: Configuring Subprocess
- Onboarding Process Tutorial 6: Completing Onboarding Process