Onboarding Process Tutorial 3: SMTP Connection
Introduction
In the era of automation and seamless communication, integrating messaging capabilities into business processes is more essential than ever. Hyperion Edition takes this a step further by enabling users to automate email workflows directly within BPMN models. By configuring SMTP connection, users can configure automated email sending as part of any process, whether it’s sending confirmations, alerts, or reports. This feature eliminates the need for external tools, allowing emails to be triggered dynamically based on process logic — all within a fully No-Code environment.
SendGrid Configuration
Twilio SendGrid's SMTP Relay feature enables you to send emails with your personal gmail account. That's the service that will be used for the purposes of this tutorial.
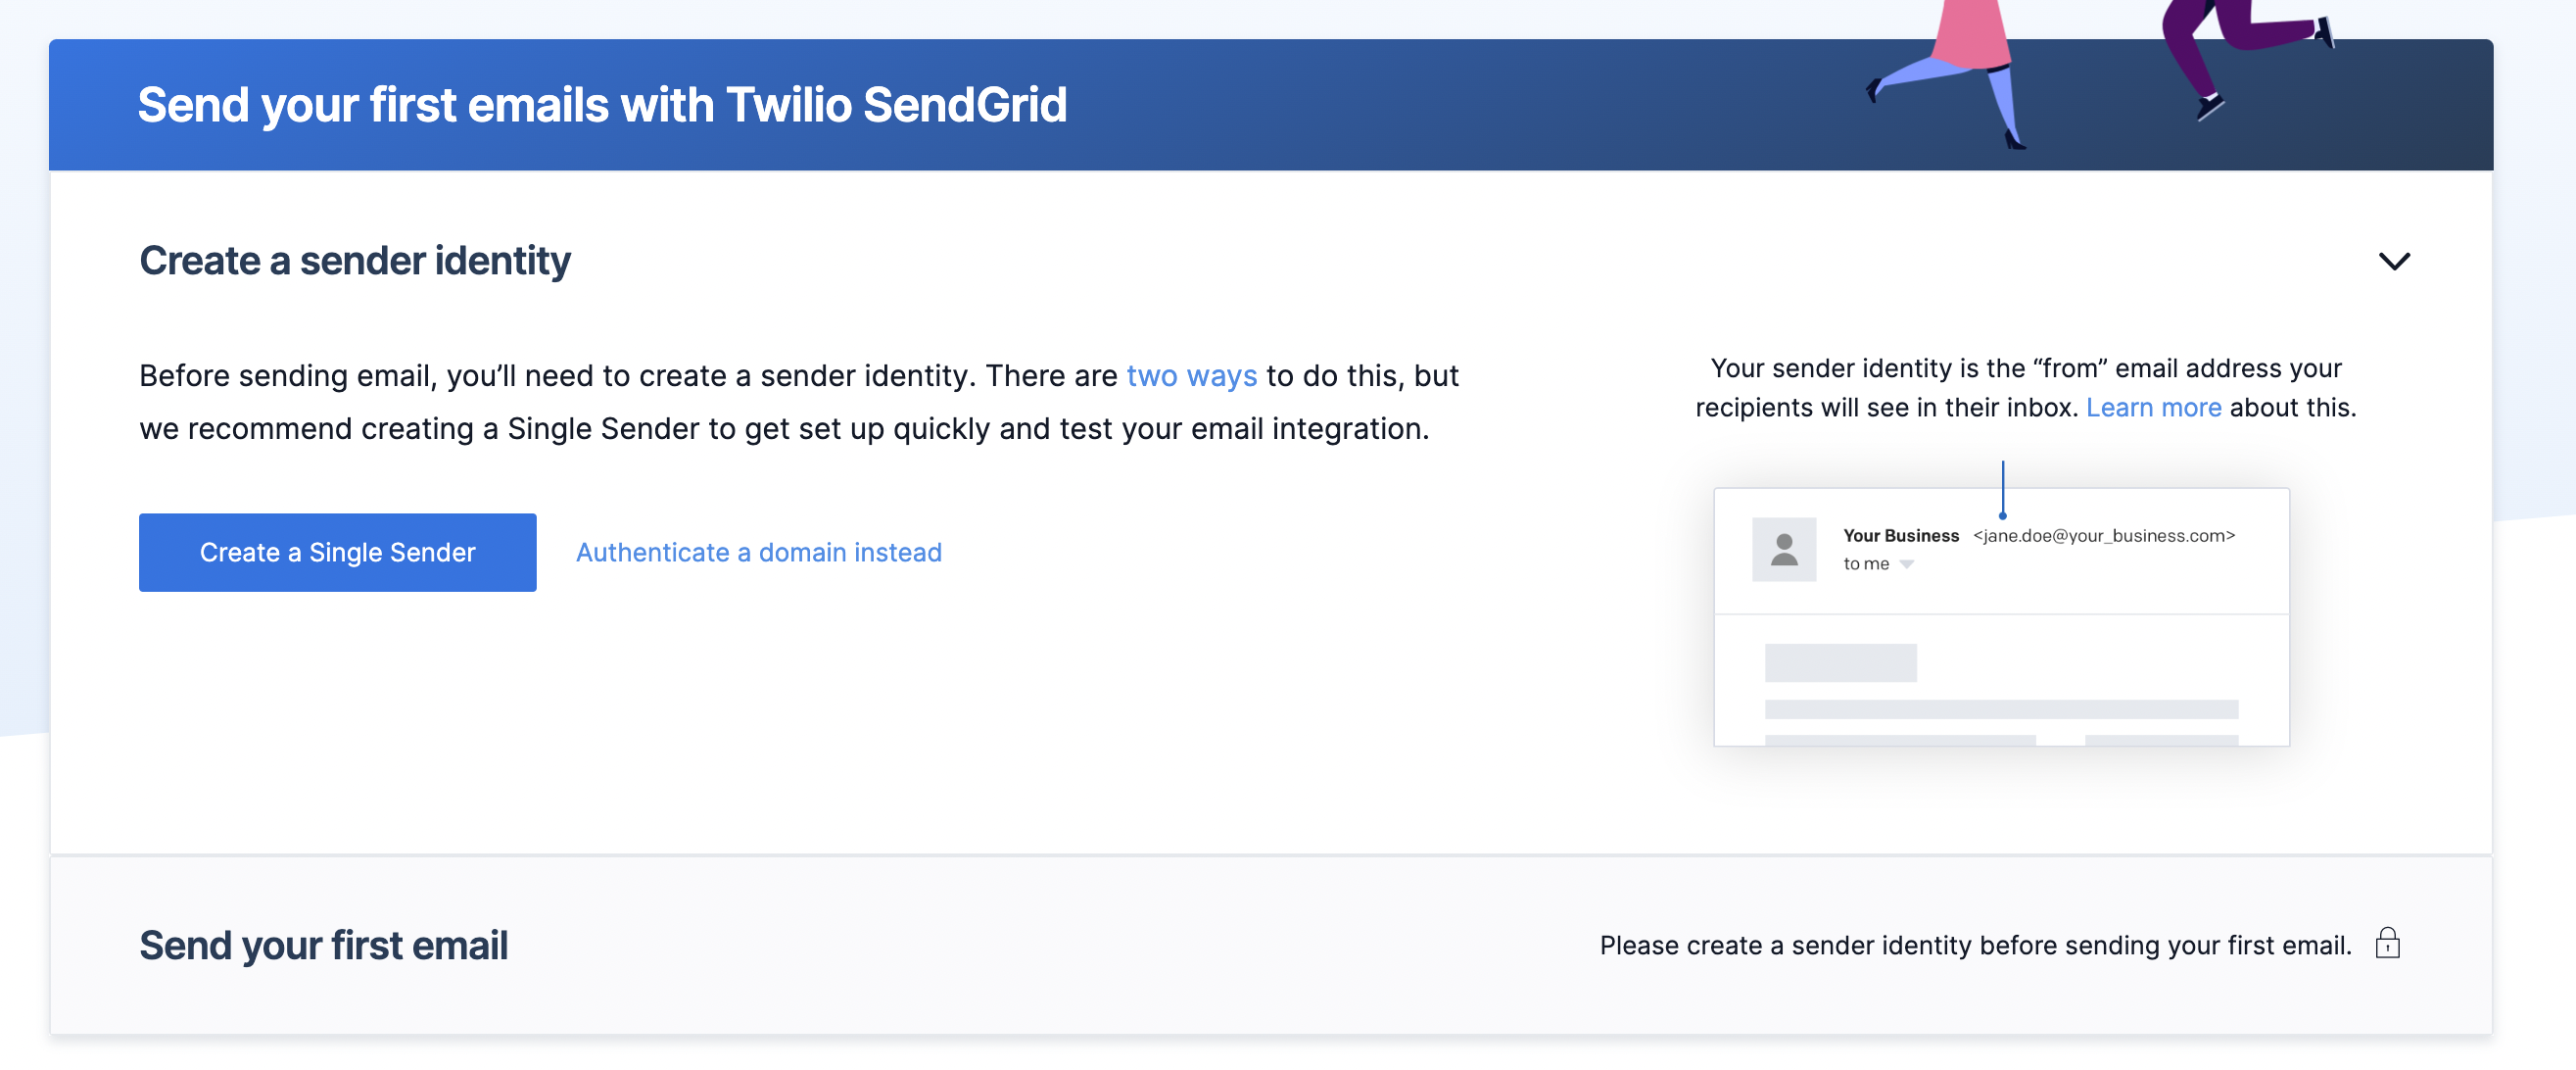
Verifying a Single Sender
- Create a SendGrid account at https://sendgrid.com.
- Login at https://app.sendgrid.com.
- Click Settings → Sender Authentication → Verify a Single Sender.
- Enter the details of the email address that will send all automated mails.
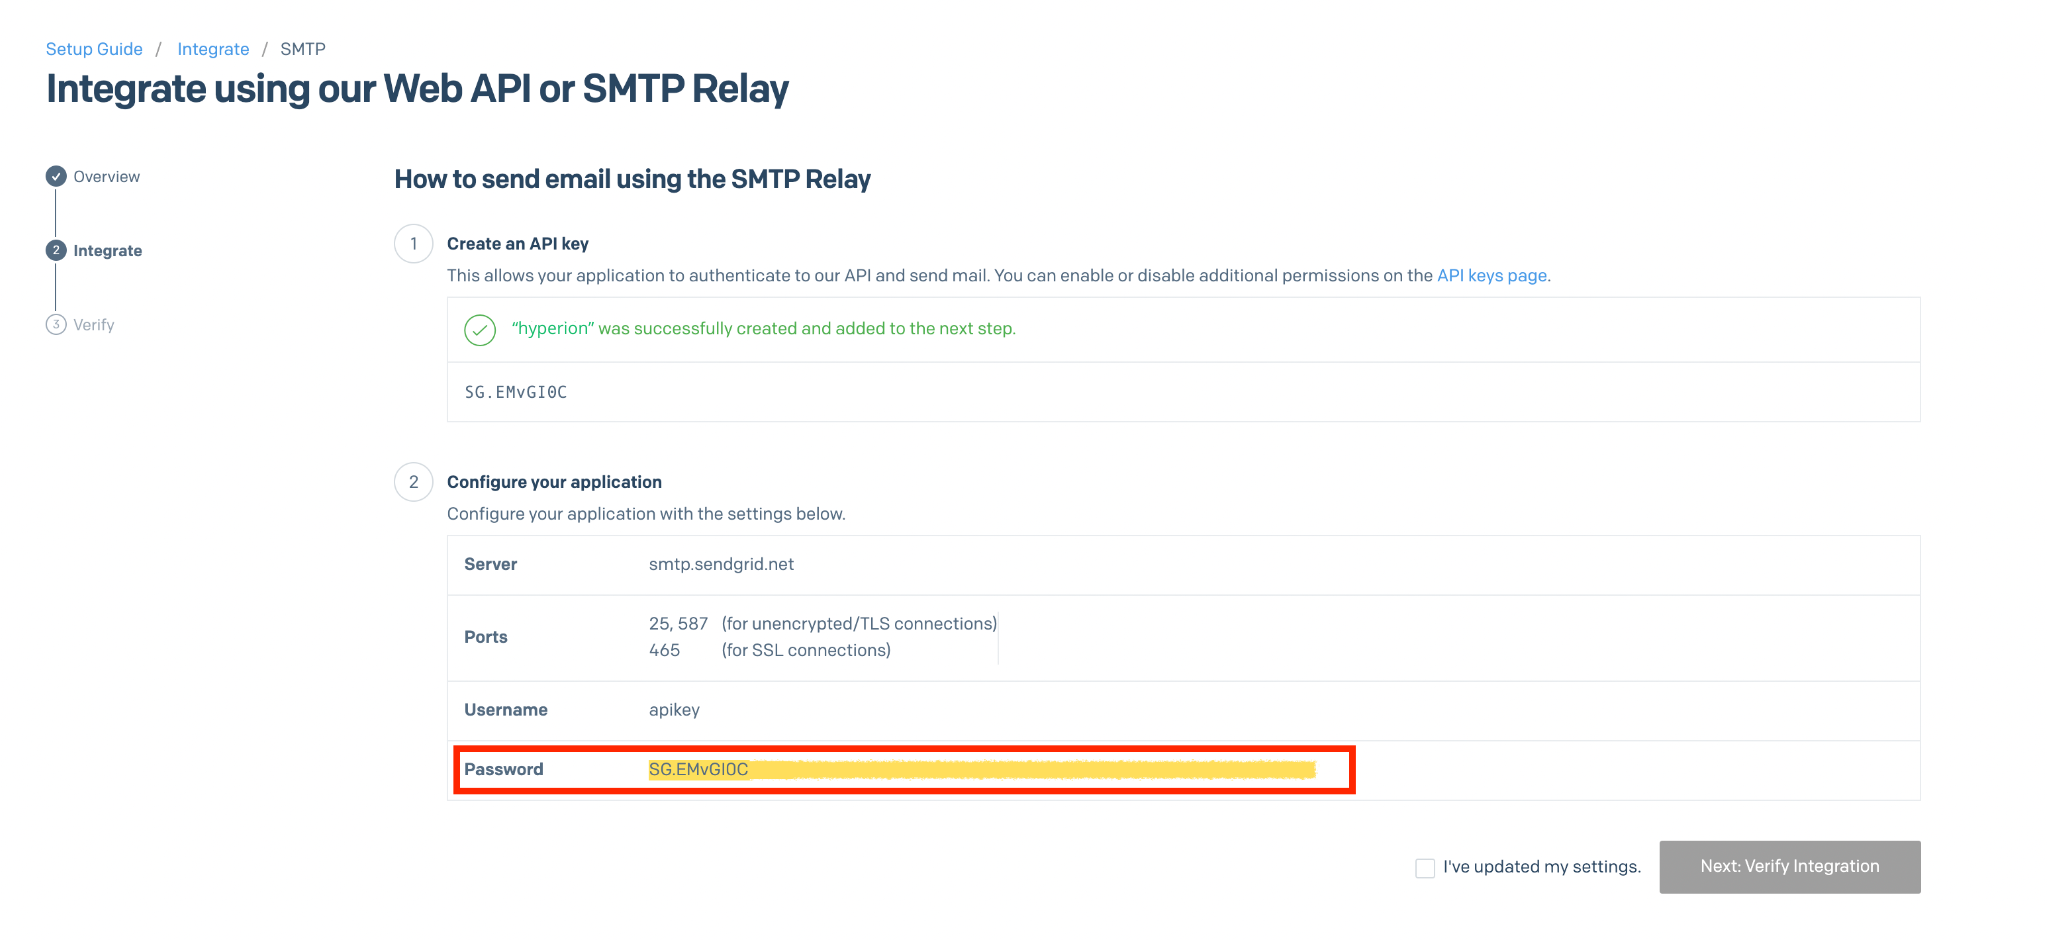
Setup SMTP Relay
- Click Email API → Integration Guide → SMTP Relay.
- Enter an API Key Name and click Create Key to get an API Key for your SendGrid SMTP Relay.
- Notice the Configure your application section, the credentials from it will be used to configure the mail client.
Hyperion Configuration
For Hyperion to connect to SendGrids' Service it needs some Environment Variables. Full list of them can be found in the Environment Variables section.
These are the needed envs:
DIRIGIBLE_MAIL_USERNAME=apikey
DIRIGIBLE_MAIL_PASSWORD=<YOUR_API_KEY_HERE>
DIRIGIBLE_MAIL_TRANSPORT_PROTOCOL=smtp
DIRIGIBLE_MAIL_SMTP_HOST=smtp.sendgrid.net
DIRIGIBLE_MAIL_SMTP_PORT=587
DIRIGIBLE_MAIL_SMTP_AUTH=true
ONBOARDING_EMAIL=<YOUR_VERIFIED_SENDGRID_EMAIL>
These envs must be added to the starting command of Hyperion. For Docker image start it will look like this:
docker run --name hyperion \
-p 80:80 \
-e DIRIGIBLE_MAIL_USERNAME=apikey \
-e DIRIGIBLE_MAIL_PASSWORD=<YOUR_API_KEY_HERE> \
-e DIRIGIBLE_MAIL_TRANSPORT_PROTOCOL=smtp \
-e DIRIGIBLE_MAIL_SMTP_HOST=smtp.sendgrid.net \
-e DIRIGIBLE_MAIL_SMTP_PORT=587 \
-e DIRIGIBLE_MAIL_SMTP_AUTH=true \
-e ONBOARDING_EMAIL=<YOUR_VERIFIED_SENDGRID_EMAIL> \
ghcr.io/codbex/codbex-hyperion:latest
Onboarding Announcement Service Task
Now that Hyperion is prepared to use SendGrids SMTP services we can implement email automation in the process.
Creating Service Task
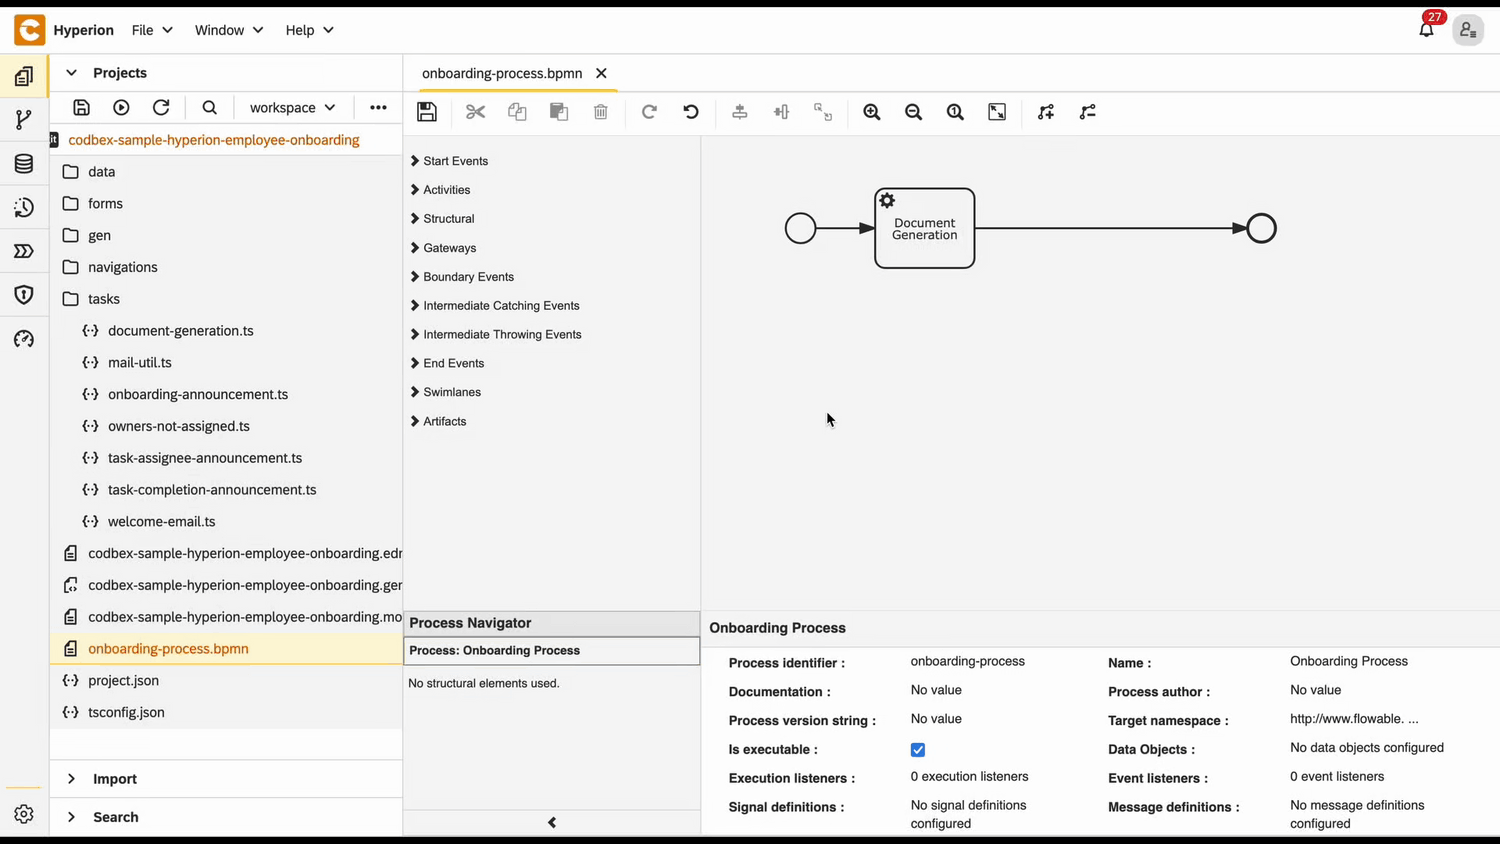
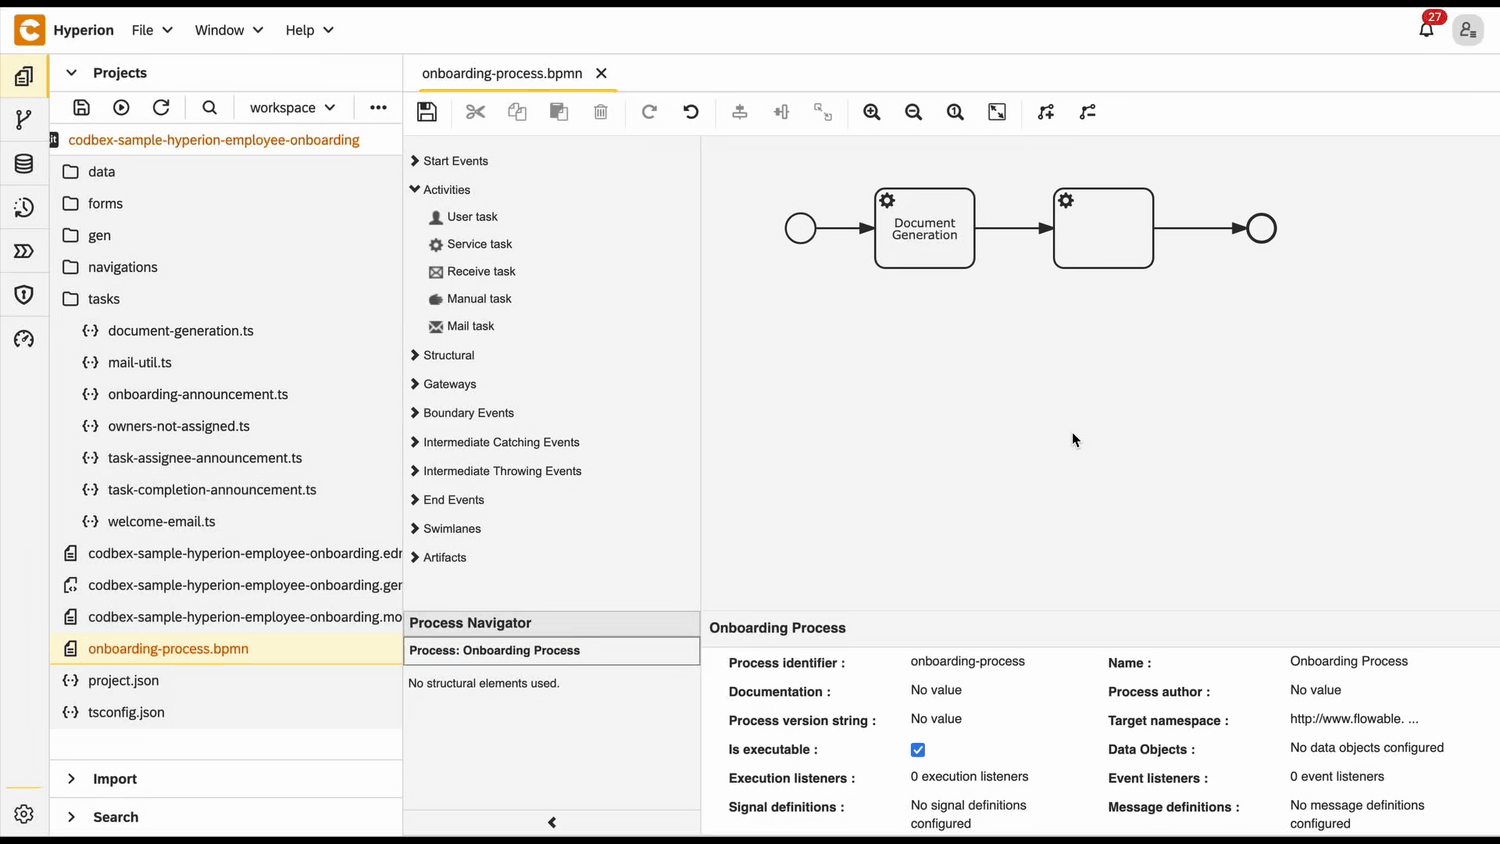
- Open the BPMN file
- From Activities grab a Service Task and place it in the diagram space
- Connect the Document Generation task to the new one
- The new one connect to the end event
- Click on the new task to open its properties
- In the Id field type
onboarding-announcement - In the Name field type
Onboarding Announcement - In the Delegate Expression field type
${JSTask} - Click on the Class field → the + button to add handler entry
- In the Name field type
handler - In the String value field type the link to the task definition
codbex-sample-hyperion-employee-onboarding/tasks/onboarding-announcement.ts
Mail Util
Throughout the process many services will be sending automated emails. To avoid code repetition a simple mail utility file can be created.
- In the tasks folder create a file called
mail-util.ts - In the new file paste the following code:
📄 View code
import { configurations } from  "sdk/core";
import { logging } from  "sdk/log";
import { client as mailClient } from  "sdk/mail";

const logger = logging.getLogger("mail-util.ts");

function isMailConfigured() {
	return configurations.get("DIRIGIBLE_MAIL_USERNAME") &&
    	configurations.get("DIRIGIBLE_MAIL_PASSWORD") &&
    	configurations.get("DIRIGIBLE_MAIL_TRANSPORT_PROTOCOL") &&
    	(
        	(configurations.get("DIRIGIBLE_MAIL_SMTPS_HOST") && configurations.get("DIRIGIBLE_MAIL_SMTPS_PORT") && configurations.get("DIRIGIBLE_MAIL_SMTPS_AUTH"))
        	||
        	(configurations.get("DIRIGIBLE_MAIL_SMTP_HOST") && configurations.get("DIRIGIBLE_MAIL_SMTP_PORT") && configurations.get("DIRIGIBLE_MAIL_SMTP_AUTH"))
    	);

}

export  function sendMail(reciever: string, subject: string, content: string) {

const sender = configurations.get("ONBOARDING_EMAIL");

if (isMailConfigured()) {
	logger.info("Sending mail to [{}] with subject [{}] and content: [{}]...", reciever, subject, content);
	mailClient.send(sender, reciever, subject, content, 'html');
} else {
	logger.error(`Mail to: ${reciever} with subject: ${subject} and content: ${content} will NOT be send because the mail client is not configured!`);
	throw  new  Error(`Mail to: ${reciever} with subject: ${subject} and content: ${content} will NOT be send because the mail client is not configured!`);
	}
}
💡 Note
This code defines the utility to send emails in Hyperion by first checking if the mail client is properly configured using the required environment variables (username, password, protocol, and SMTP/SMTPS details). If configuration is valid, it logs the action and sends an HTML email using the inner mail library; otherwise, it logs and throws an error indicating the email could not be sent due to missing configuration.
Onboarding Announcement Definition
- In the tasks folder create a file called
onboarding-announcement.ts - Paste the following code in the file:
📄 View code
import { EmployeeRepository as EmployeeDao } from "codbex-sample-hyperion-employee-onboarding/gen/codbex-sample-hyperion-employee-onboarding/dao/Employee/EmployeeRepository";
import { DepartmentRepository as DepartmentDao } from "codbex-sample-hyperion-employee-onboarding/gen/codbex-sample-hyperion-employee-onboarding/dao/Department/DepartmentRepository";
import { process } from "sdk/bpm";
import { sendMail } from "./mail-util";
const employeeDao = new EmployeeDao();
const departmentDao = new DepartmentDao();
const execution = process.getExecutionContext();
const executionId = execution.getId();
const managerId = process.getVariable(executionId, "Manager");
let managerLink = process.getVariable(executionId, "ManagerLink");
const employeeId = process.getVariable(executionId, "Employee");
const manager = employeeDao.findById(managerId);
if (!manager) {
throw new Error(`Employee with ID ${managerId} not found!`);
}
const employee = employeeDao.findById(employeeId);
if (!employee) {
throw new Error(`Employee with ID ${employeeId} not found!`);
}
const departmentName = departmentDao.findById(employee.Department).Name;
const subject = "Employee Onboarding Review";
const processInstanceId = execution.getProcessInstanceId();
managerLink = `${managerLink}&processId=${processInstanceId}`;
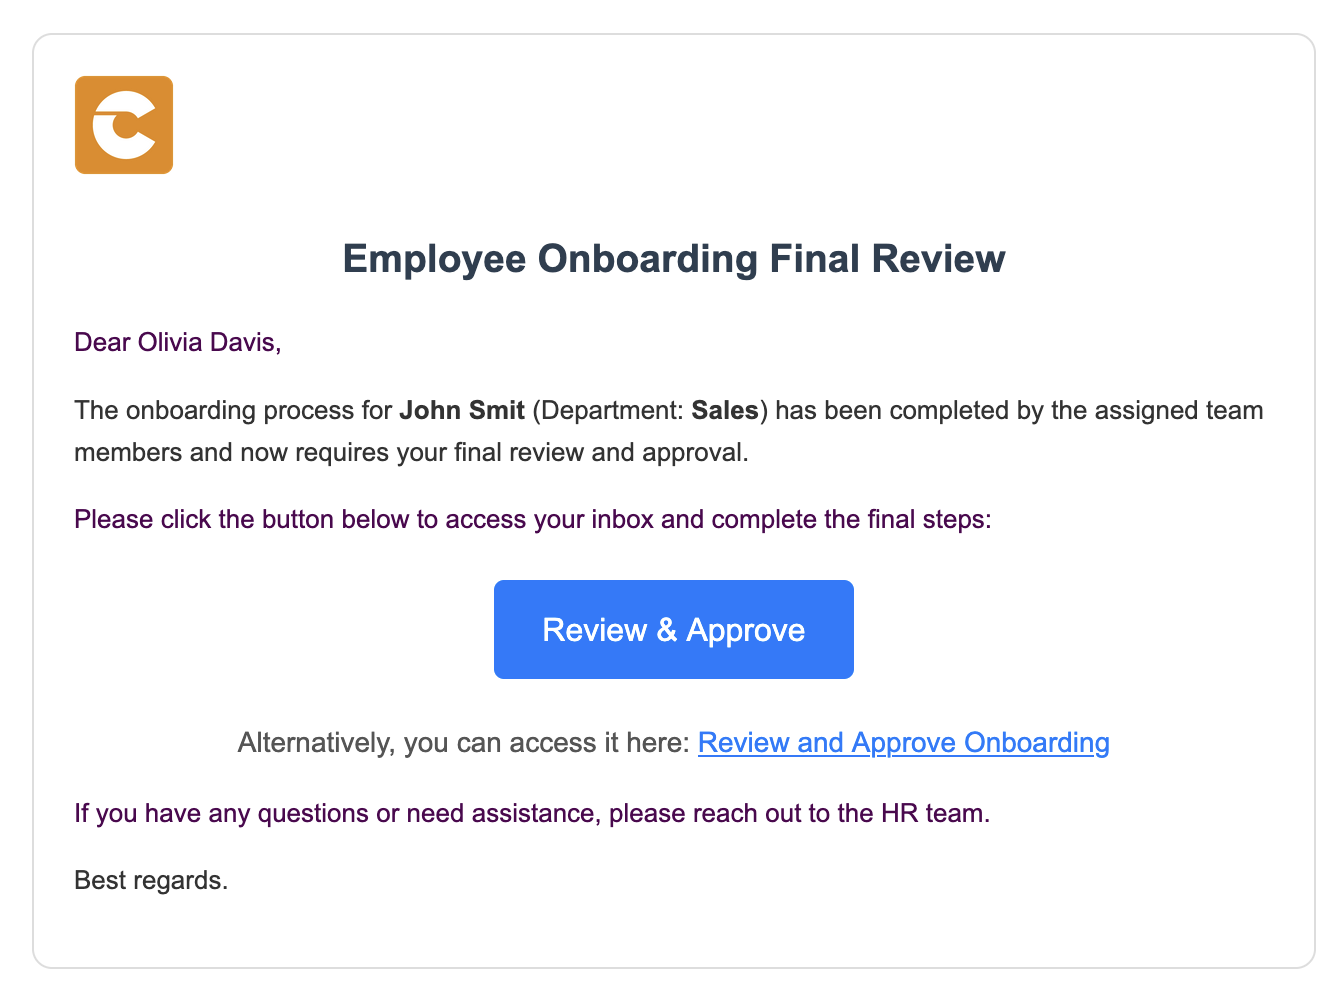
const content = `
<div style="font-family: Arial, sans-serif; line-height: 1.6; color: #333; max-width: 600px; margin: auto; padding: 20px; border: 1px solid #ddd; border-radius: 10px;">
<div style="text-align: left; margin-bottom: 20px;">
<img src="https://raw.githubusercontent.com/codbex/codbex.github.io/main/docs/images/logos/codbex-logo.png" alt="Company Logo" style="width: 50px; height: 50px;">
</div>
<h2 style="color: #2c3e50; text-align: center;">Action Required: Onboarding Task Assignment</h2>
<p>Dear ${manager.Name},</p>
<p>An onboarding request has been submitted for <strong>${employee.Name}</strong> (Department: <strong>${departmentName}</strong>), and it requires your attention.</p>
<p>Please review the onboarding details and assign responsible team members to the relevant tasks.</p>
<p>Once all assignments are completed, kindly approve the onboarding process to proceed.</p>
<div style="text-align: center; margin: 20px 0;">
<a href="${managerLink}" target="_blank" style="
display: inline-block;
padding: 12px 24px;
font-size: 16px;
color: #fff;
background-color: #007bff;
text-decoration: none;
border-radius: 5px;
">Review & Assign Tasks</a>
</div>
<p style="text-align: center; font-size: 14px; color: #555;">
Alternatively, you can access it here:
<a href="${managerLink}" target="_blank" style="color: #007bff; text-decoration: underline;">
Review Onboarding Details
</a>
</p>
<p>If you have any questions or need assistance, please contact the HR team.</p>
<p>Best regards.</p>
</div>
`;
sendMail(manager.Email, subject, content);💡 Note
This script retrieves the manager, employee, and department details from the database using their respective DAOs, constructs a personalized HTML email prompting the manager to review and assign onboarding tasks, and sends the email using a mail utility. It ensures the necessary data is present, generates a dynamic link to the onboarding process, and includes professional formatting to guide the manager's next steps. The manager form will be created in the next tutorial
Test BPMN Process
- Go to the Dashboard of the application at http://localhost/services/web/dashboard/ → Click the New Hire Navigation
- Enter the details of the new hire
- After some time the tasks of the onboarding process will be created. To view them go to the Dashboard of the application at http://localhost/services/web/dashboard/ → Click the Onboarding Tasks Navigation
- Check the manager's email. There should be a mail.
Other blogs
- Onboarding Process Tutorial 1: EDM Configuration
- Onboarding Process Tutorial 2: BPMN Configuration - Service Task Definition
- Onboarding Process Tutorial 3: SMTP Connection
- Onboarding Process Tutorial 4: User Task Definition and Logical Gateways
- Onboarding Process Tutorial 5: Configuring Subprocess
- Onboarding Process Tutorial 6: Completing Onboarding Process