How "Depends On" feature in Rhea Simplifies App Development
Introduction
In today’s fast-paced business world, low-code platforms are revolutionizing app development, enabling users to create powerful applications with minimal coding. Rhea Edition simplifies application modeling by offering a robust environment for designing domain models and custom forms. One standout feature of Rhea is "Depends On", which enables that data coming from different entities is seamlessly interconnected. This unique feature automatically adjusts related elements, making it easier to manage complex app relationships and build scalable solutions faster in the No-Code manner.
Case I - Country-City Dependency
Entities
Create a New Project
- Create a new project and name it
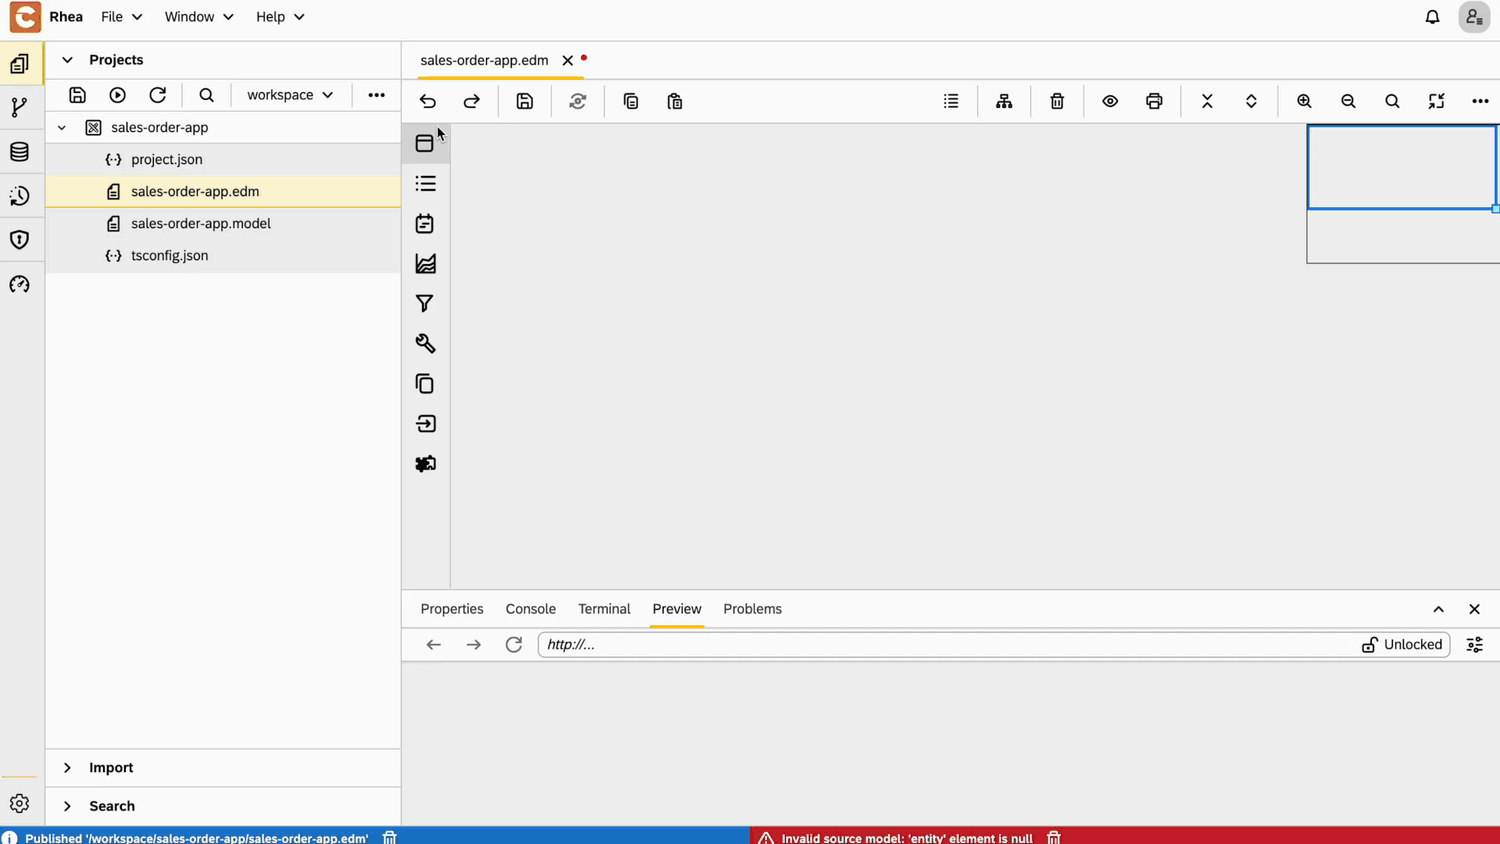
sales-orders-app. - Right-click on Project → New → Entity Data Model and name it
sales-order-app.edm.
Country Entity
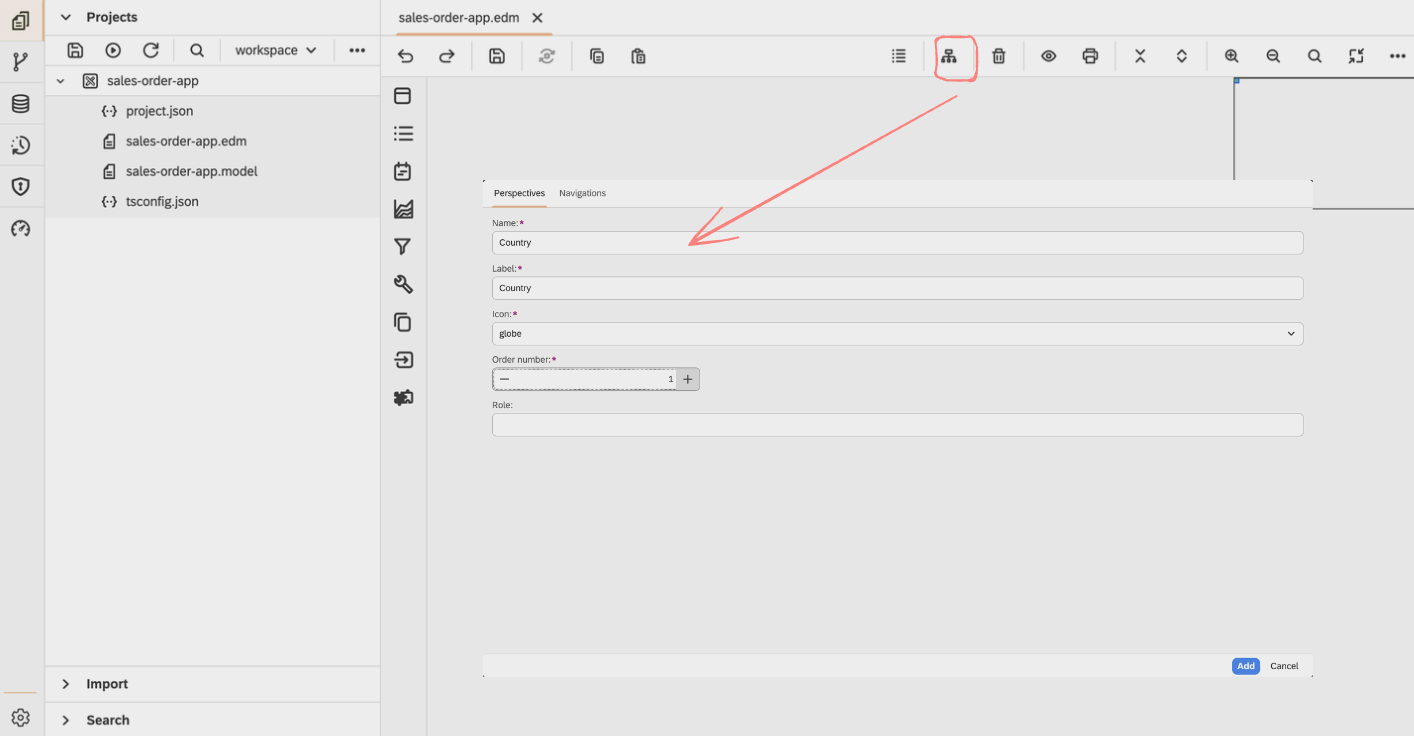
- Add Perspective for
Country
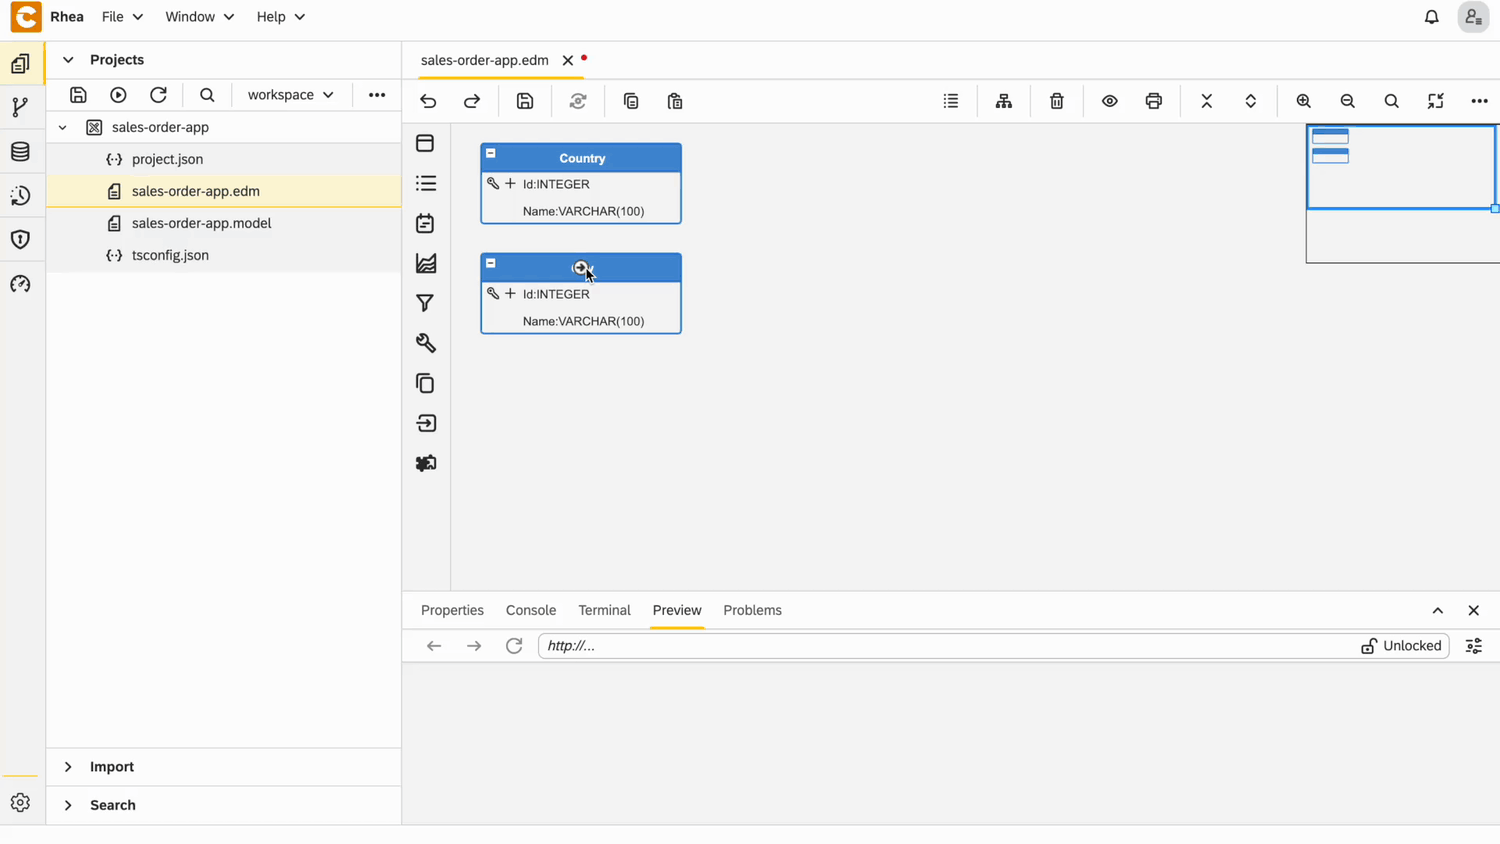
- Create an entity and set its name to
Country
- Right-click on the entity and open
Properties - In the User Interface section:
- Set Layout type to
Manage Master Entities - Choose the already defined perspective:
Country
- Set Layout type to
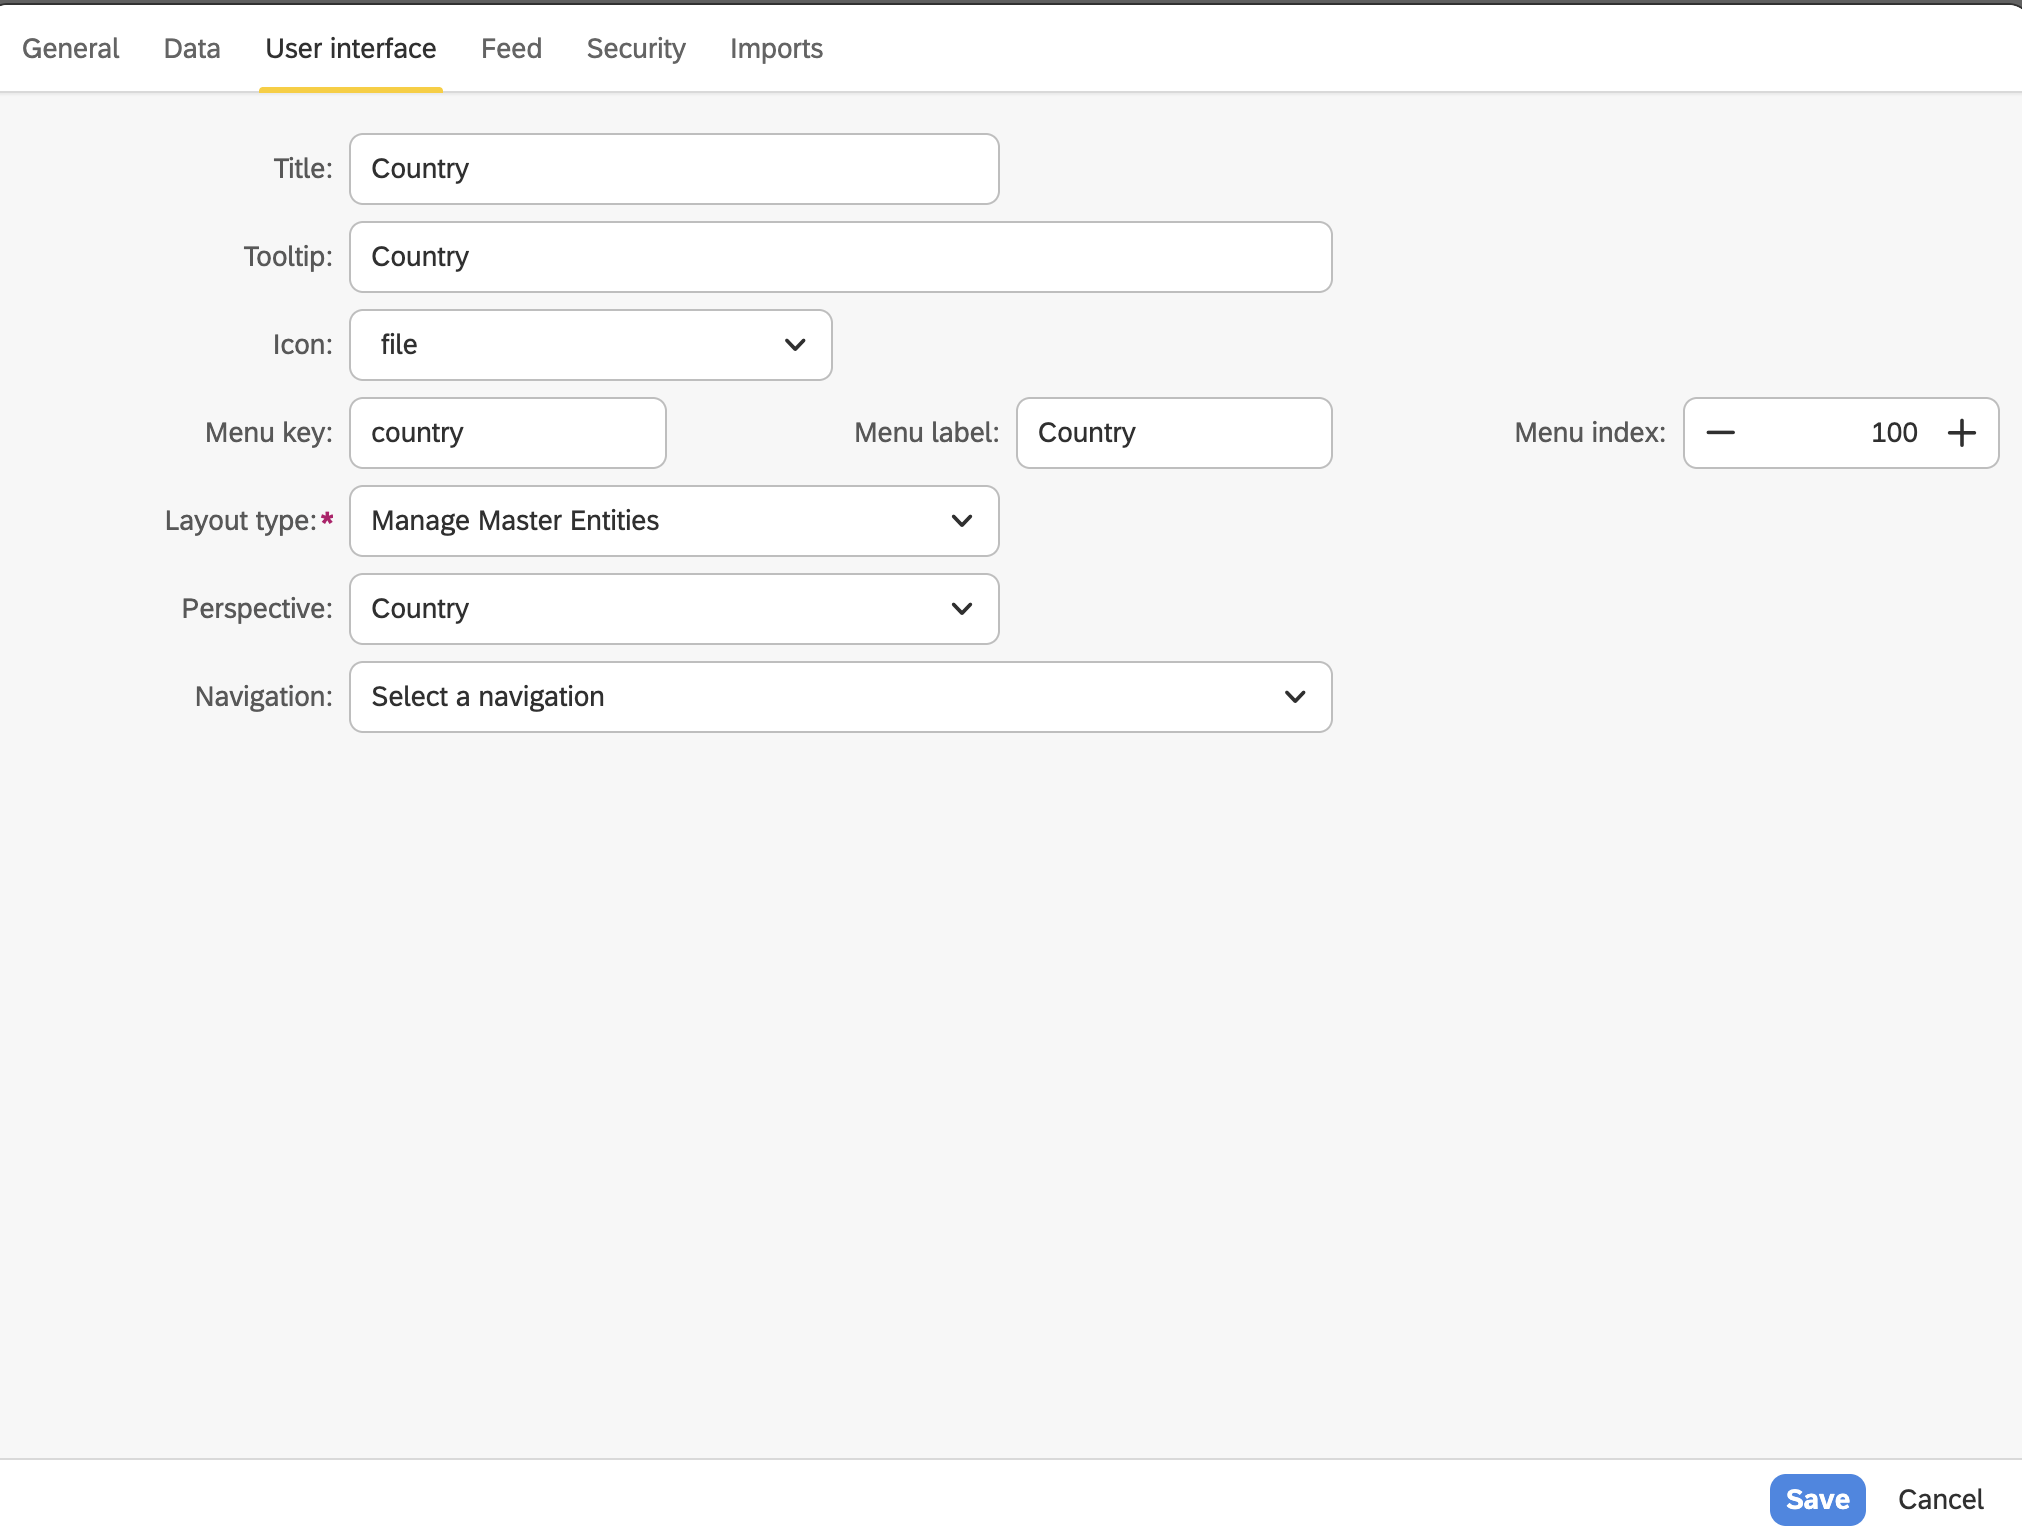
- Add text field for
Name
City Entity
- Create entity and set its name to
City - Right-click on the entity
- From the General tab, set Entity Type to
Dependent - Open Properties
- In the User Interface section:
- Set Layout type to
Manage Details Entity - Choose the already defined perspective -
Country
- Set Layout type to
- From the General tab, set Entity Type to
- Add text field for
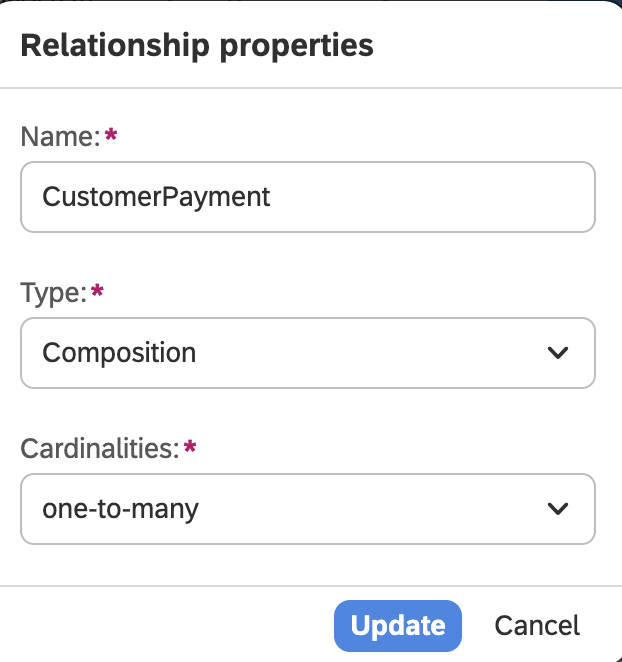
Name - Add relationship to
Countryand set its properties
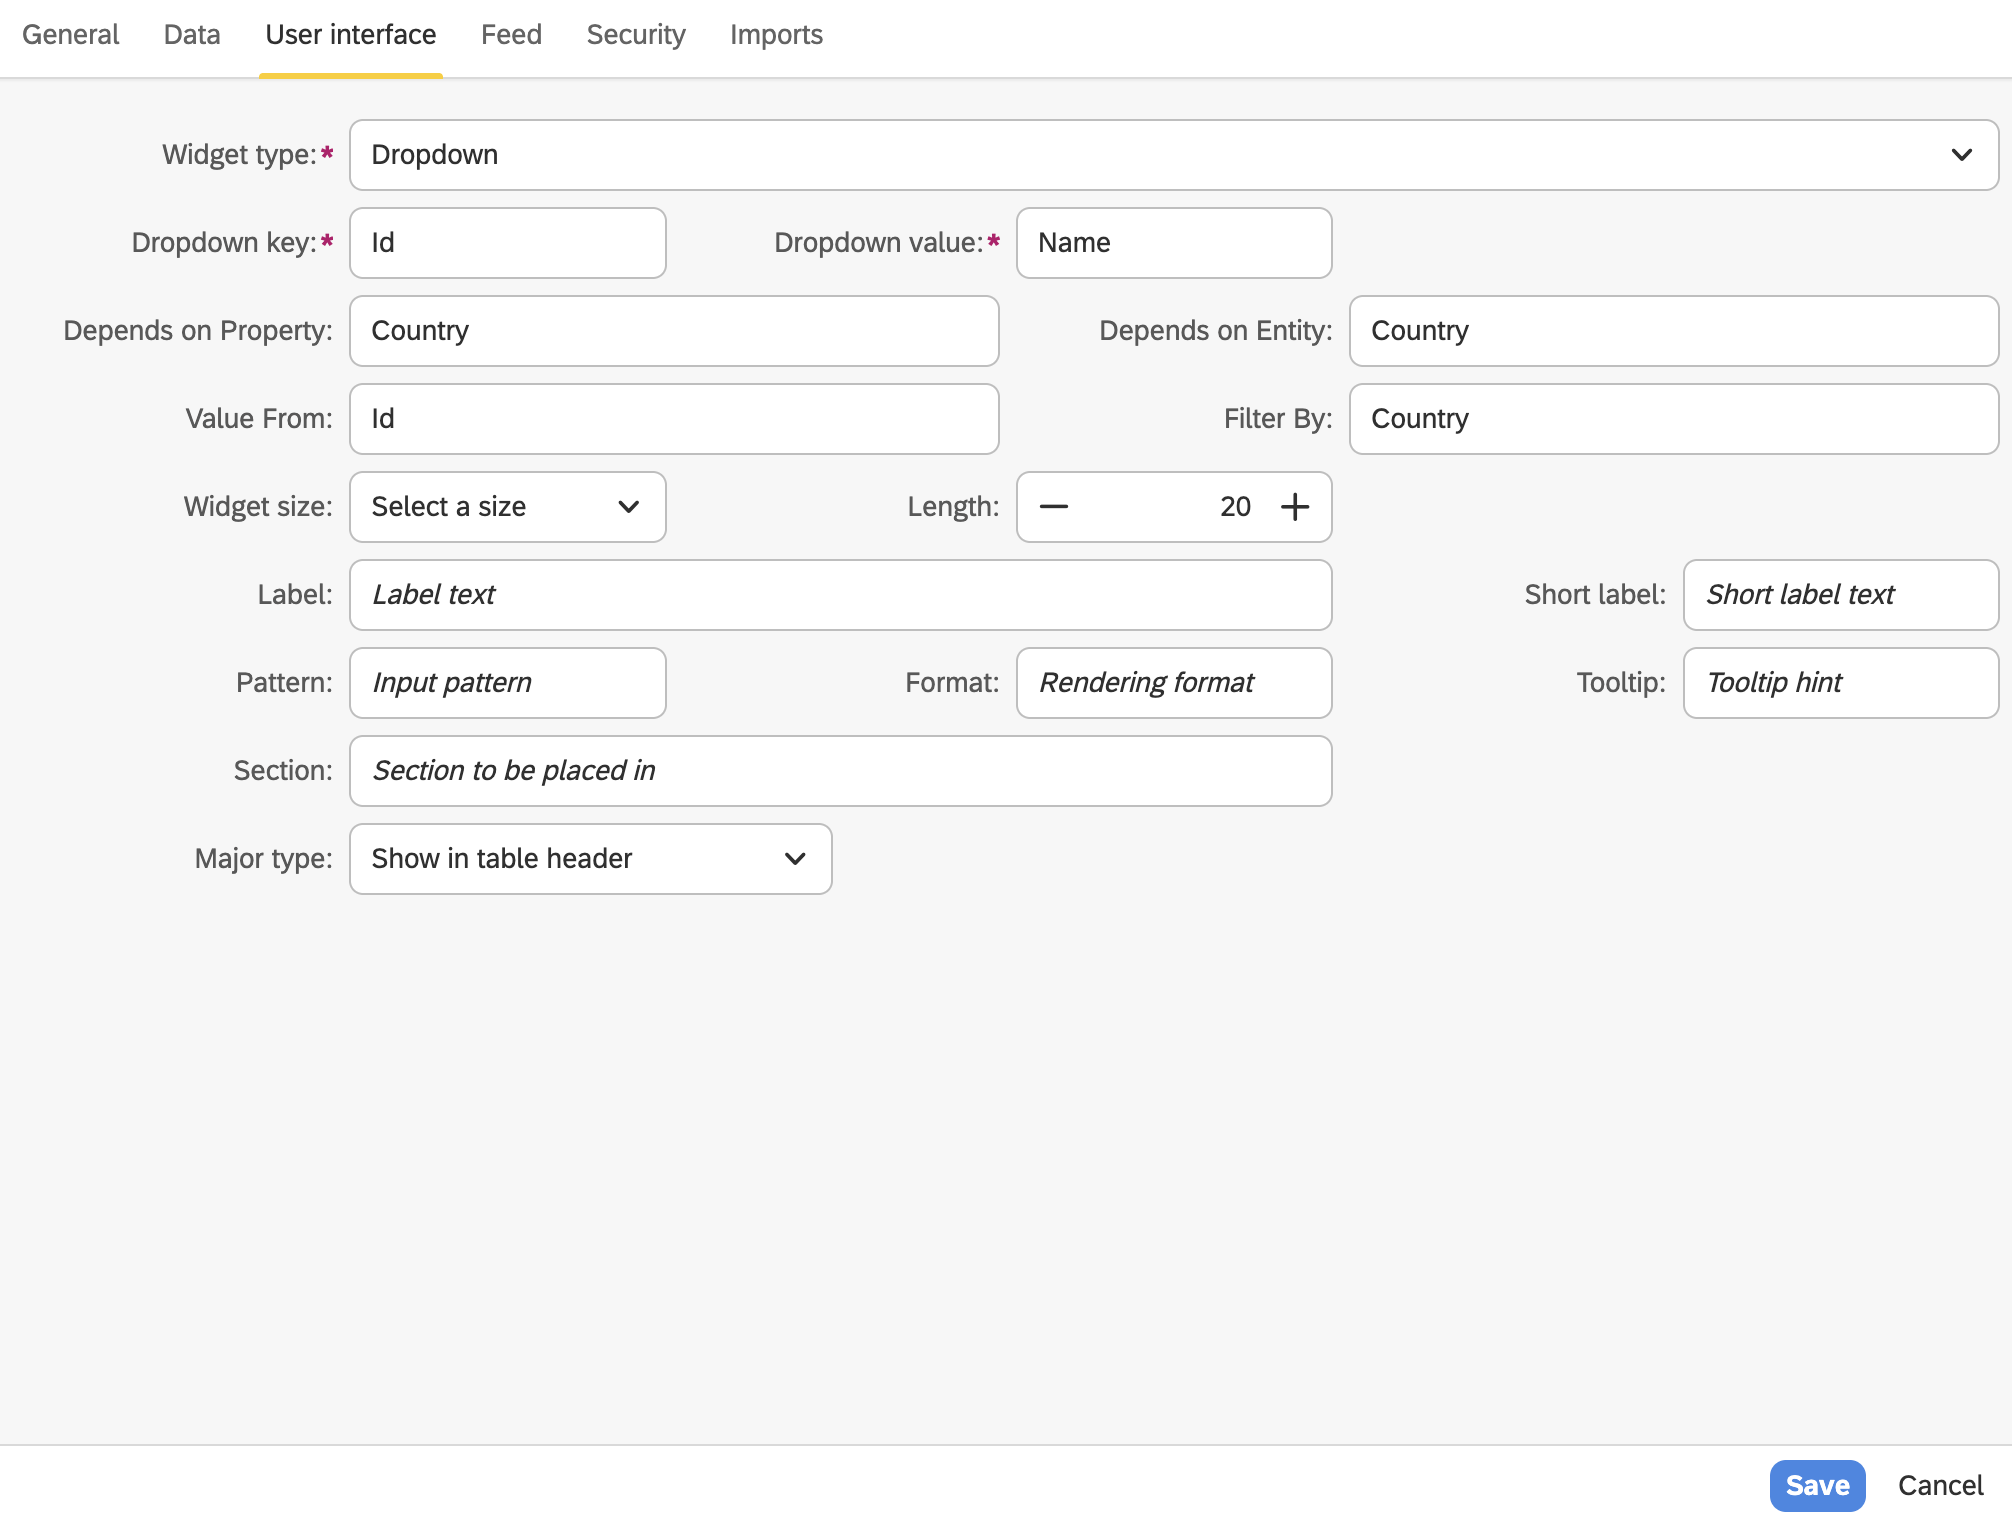
Configuration for Country field
- From User Interface view, choose:
Dropdownfor widget typeIdfor dropdown keyNamefor dropdown value
Customer Entity
- Add perspective for
Customer - Create entity
Customer - Open Properties
- In the User Interface section:
- Set Layout type to
Manage Master Entity - Choose the already defined perspective -
Customer
- Set Layout type to
- Add text field for
Name - Add relationship to
Country
Configuration for Country field
From User Interface view, choose:
Dropdownfor widget typeIdfor dropdown keyNamefor dropdown value
Add relationship to
City
Configuration for City field
- From User Interface view, choose:
Dropdownfor widget typeIdfor dropdown keyNamefor dropdown value
- Add text field for
Address
Configuration:
In the Country field set:
- Depends on Property:
Country - Depends on Entity:
Country - Value From:
Id - Filter By:
Country
Case I - Country-City Dependency - Showcase
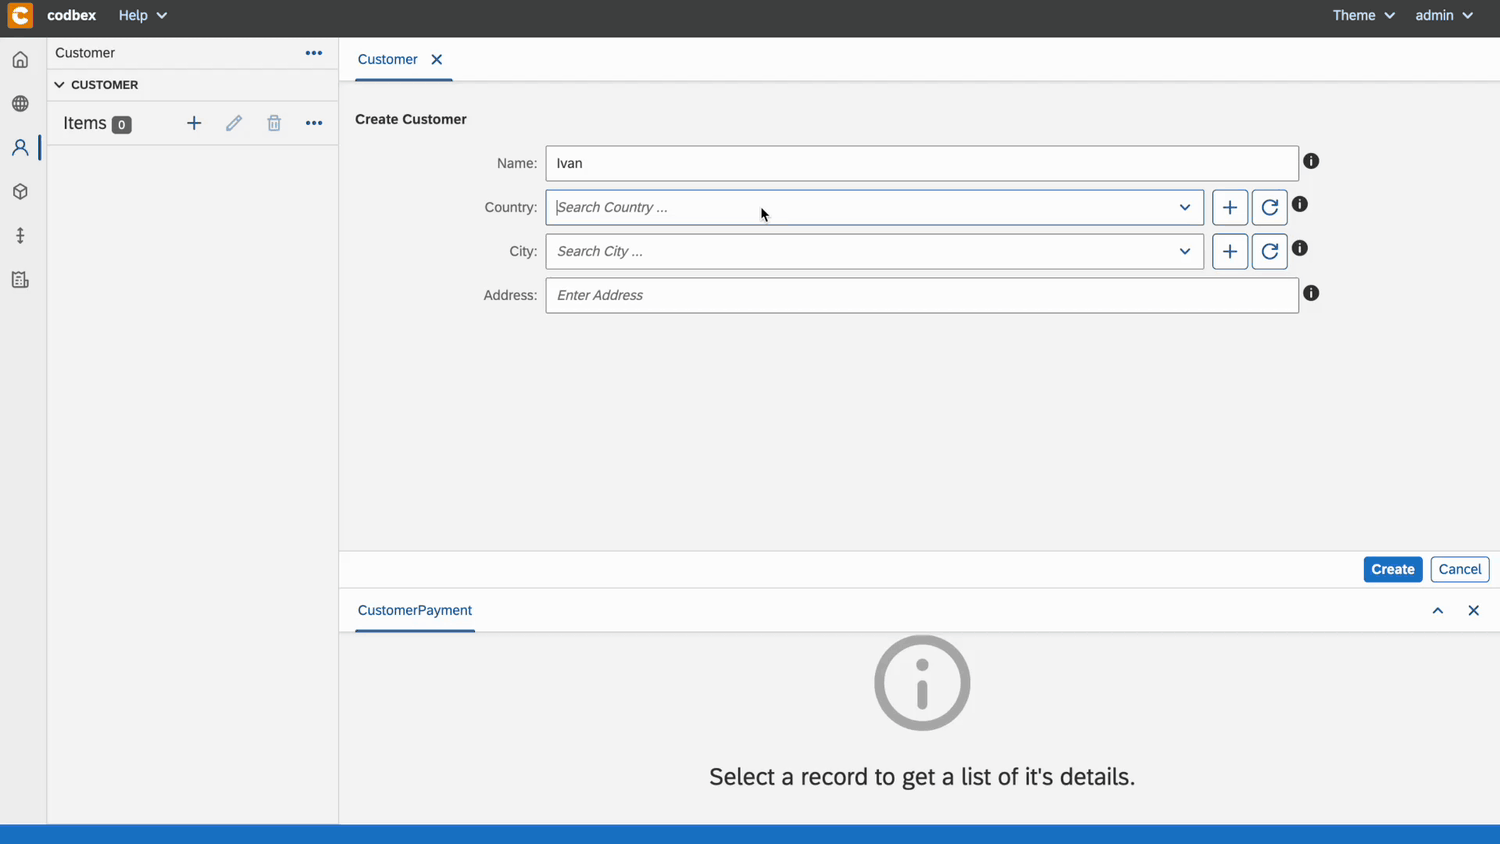
Note: This is the so-called “Country-City Dependency”, which represents the relation via the Id of the referred entity. This configuration selects a Country, and the City dropdown will then display only the cities that belong to the chosen Country.
Case II - Product-UoM
Entities
Customer Payment Entity
- Create entity
CustomerPayment - Right-click on the entity. From General tab, set Entity Type to Dependent.
- Open Properties
- In the User Interface section:
- Set Layout type to
Manage Details Entity - Choose the already defined perspective -
Customer
- Set Layout type to
- Add text field for
Name - Add relationship to
Customerand set its properties:
Configuration for Customer field
From User Interface view, choose:
Dropdownfor widget typeIdfor dropdown keyNamefor dropdown value
Add number field for
Amount
Unit Of Measurement Entity
- Add perspective for
UoM - Create entity
UoM(Unit of Measurement) - Open Properties
- In the User Interface section:
- Set Layout type to
Manage Master Entity - Choose the already defined perspective -
UoM
- Set Layout type to
- Add text field for
Name
Product Entity
- Add perspective for
Product - Create entity
Product - Open Properties
- In the User Interface section:
- Set Layout type to
Manage Master Entity - Choose the already defined perspective -
Product
- Set Layout type to
- Add text field for
Name - Add relationship to
UoM
Configuration for UoM field
From User Interface view, choose:
Dropdownfor widget typeIdfor dropdown keyNamefor dropdown value
Add decimal field for
Price
Sales Order Entity
- Add perspective for
SalesOrder - Create entity
SalesOrder - Open Properties
- In the User Interface section:
- Set Layout type to
Manage Master Entity - Choose the already defined perspective -
Product
- Set Layout type to
- Add relationship to
SalesOrder
Configuration for SalesOrder field
From User Interface view, choose:
Dropdownfor widget typeIdfor dropdown keyNamefor dropdown value
Add date field for
Date
Sales Order Item Entity
- Create entity
SalesOrderItem - Right-click on the entity. From General tab, set Entity Type to
Dependent. - Open Properties
- In the User Interface section:
- Set Layout type to
Manage Details Entity - Choose the already defined perspective -
SalesOrder
- Set Layout type to
- Add relationship to
SalesOrderand set its properties. - Add relationship to
Product
Configuration for Product field
From User Interface view, choose:
Dropdownfor widget typeIdfor dropdown keyNamefor dropdown value
Add relationship to
UoM
Configuration for UoM field
- From User Interface view, choose:
Dropdownfor widget typeIdfor dropdown keyNamefor dropdown value
Configuration
In the UoM field set:
- Depends on Property:
Product - Depends on Entity:
Product - Value From:
UoM - Filter By:
Id
Case II - Product-UoM - Showcase
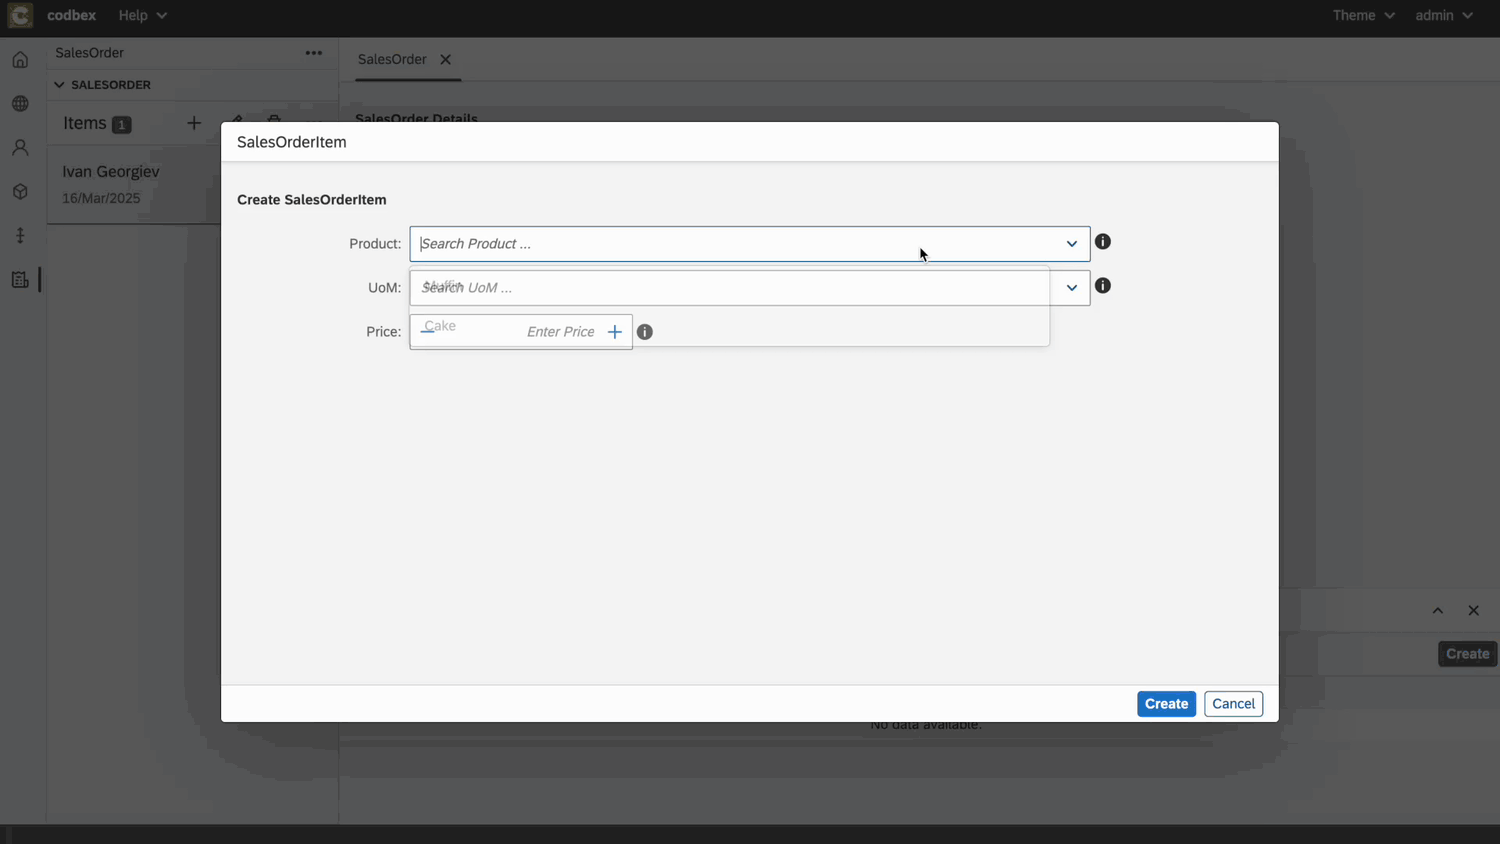
Note: This configuration selects the chosen Product, retrieves its UoM, and automatically sets it for the Sales Order Item.
Case III - Product-Price
Entities
In this case we will reuse the entities from the previous section, just will add one more configuration for the user interface:
Configuration
- Add decimal field for
Price
In the Price field set:
- Depends on Property:
Product - Depends on Entity:
Product - Value From:
Price
Case III - Product-Price - Showcase
Note: This configuration selects the chosen Product, retrieves its Price, and automatically sets it for the Sales Order Item.
Case IV - Order-Customer
Entities
Sales Order Payment Entity
- Create entity
SalesOrderPayment - Right-click on the entity. From General tab, set Entity Type to
Dependent. - Open Properties
- In the User Interface section:
- Set Layout type to
Manage Details Entity - Choose the already defined perspective -
SalesOrder
- Set Layout type to
- Add relationship to
SalesOrderand set its properties. - Add relationship to
Customer
Configuration for Customer field
- From User Interface view, choose:
Dropdownfor widget typeIdfor dropdown keyNamefor dropdown value
Configuration:
In the Customer field set:
- Depends on Property:
SalesOrder - Depends on Entity:
SalesOrder - Value From:
Customer - Filter By:
Id
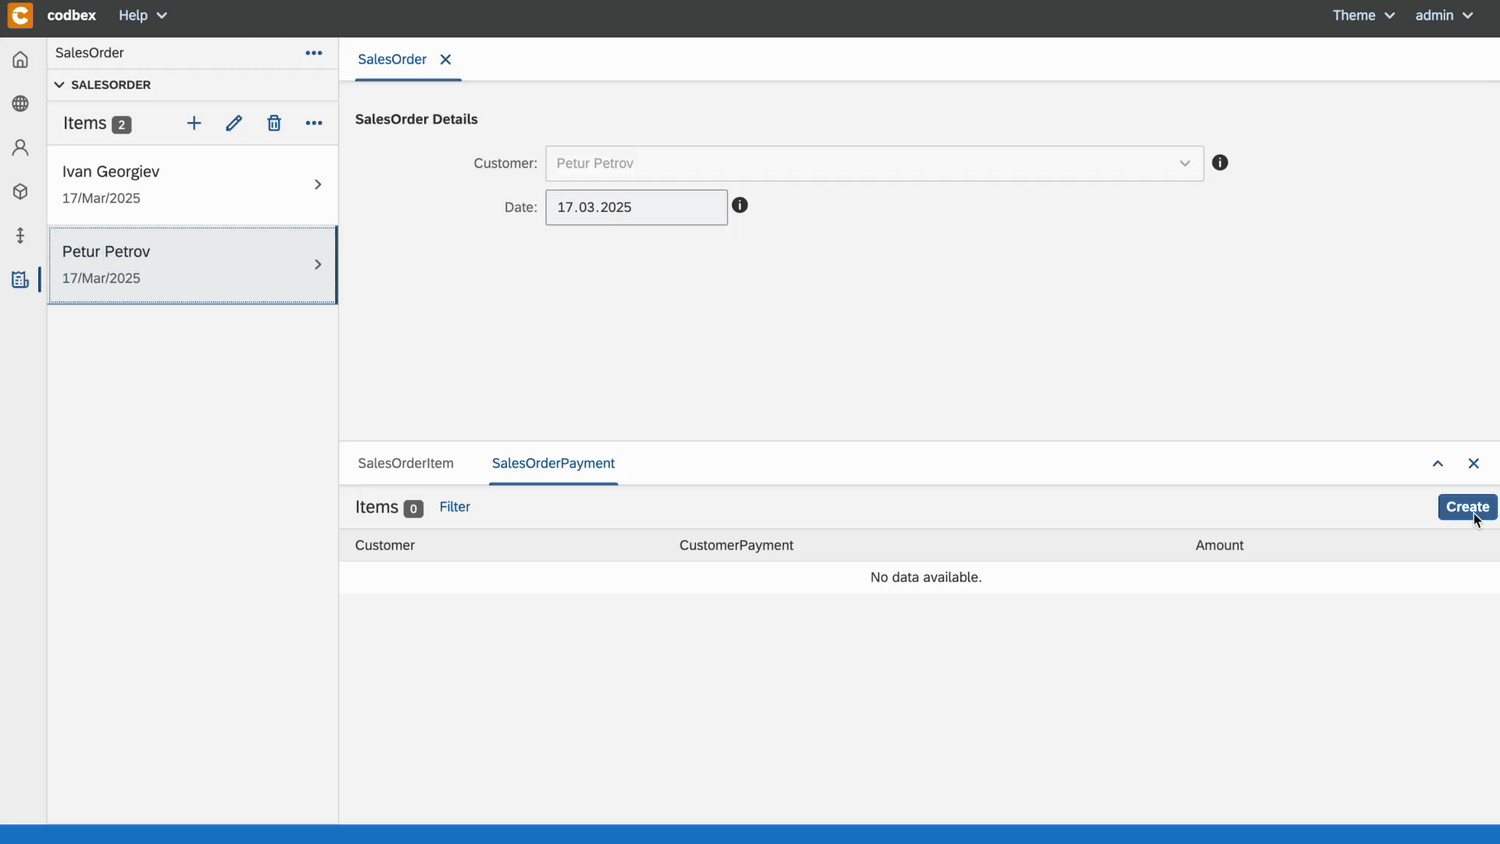
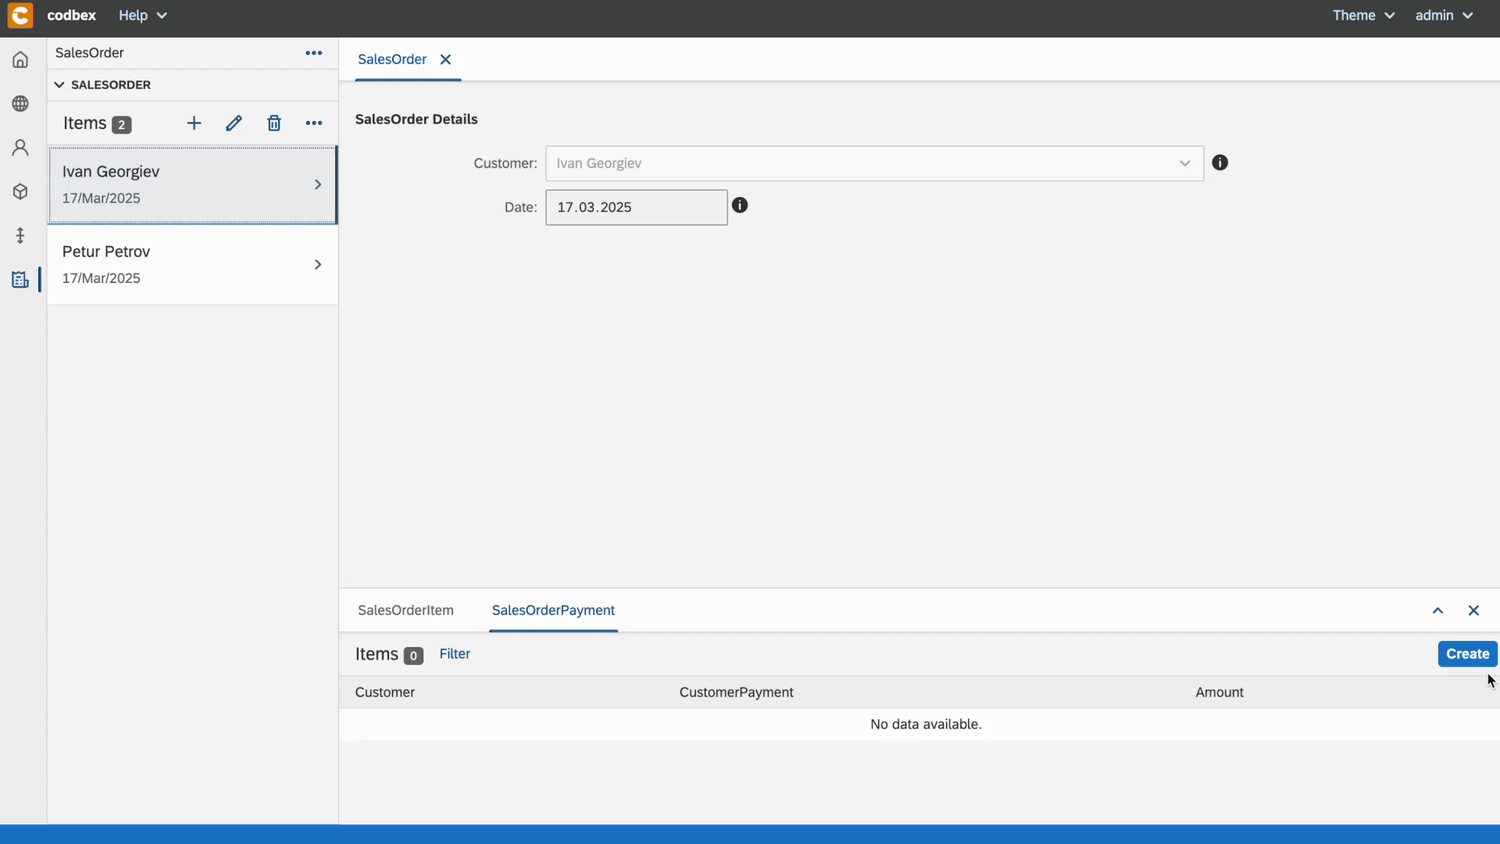
Case IV - Order-Customer - Showcase
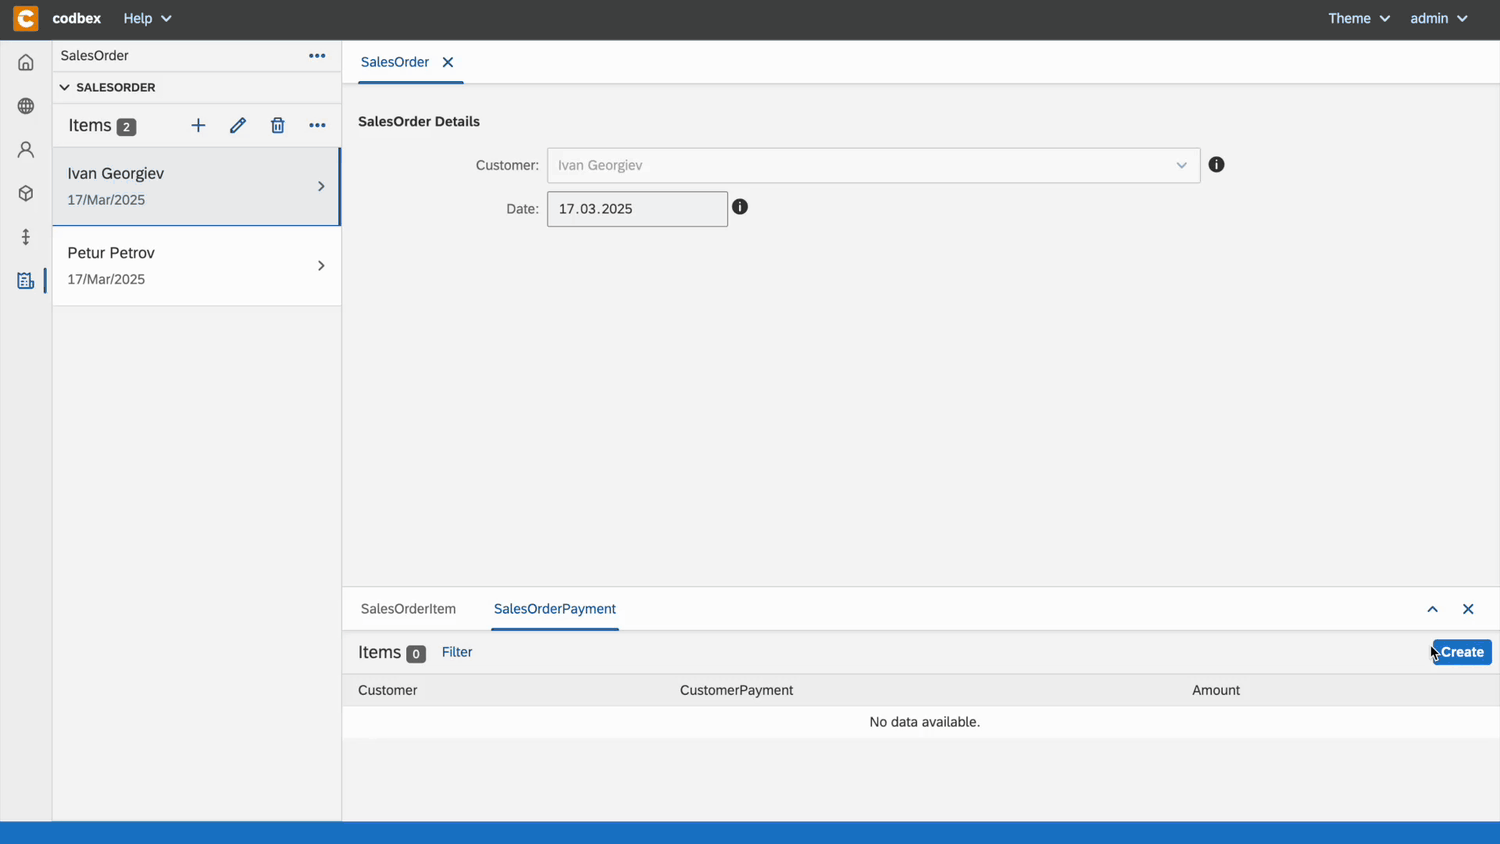
Note: This configuration selects Sales Order, and the Customer dropdown will then display only the Customer that belongs to the chosen Sales Order.
Case V - Customer-Payment
Entities
In this case we will reuse the entities from the previous section, just will add one more configuration for the user interface:
- Add relationship to
CustomerPayment
Configuration for CustomerPayment field
- From User Interface view, choose:
Dropdownfor widget typeIdfor dropdown keyNamefor dropdown value
Configuration:
In the Customer field set:
- Depends on Property:
Customer - Depends on Entity:
CustomerPayment - Value From:
Id - Filter By:
Customer
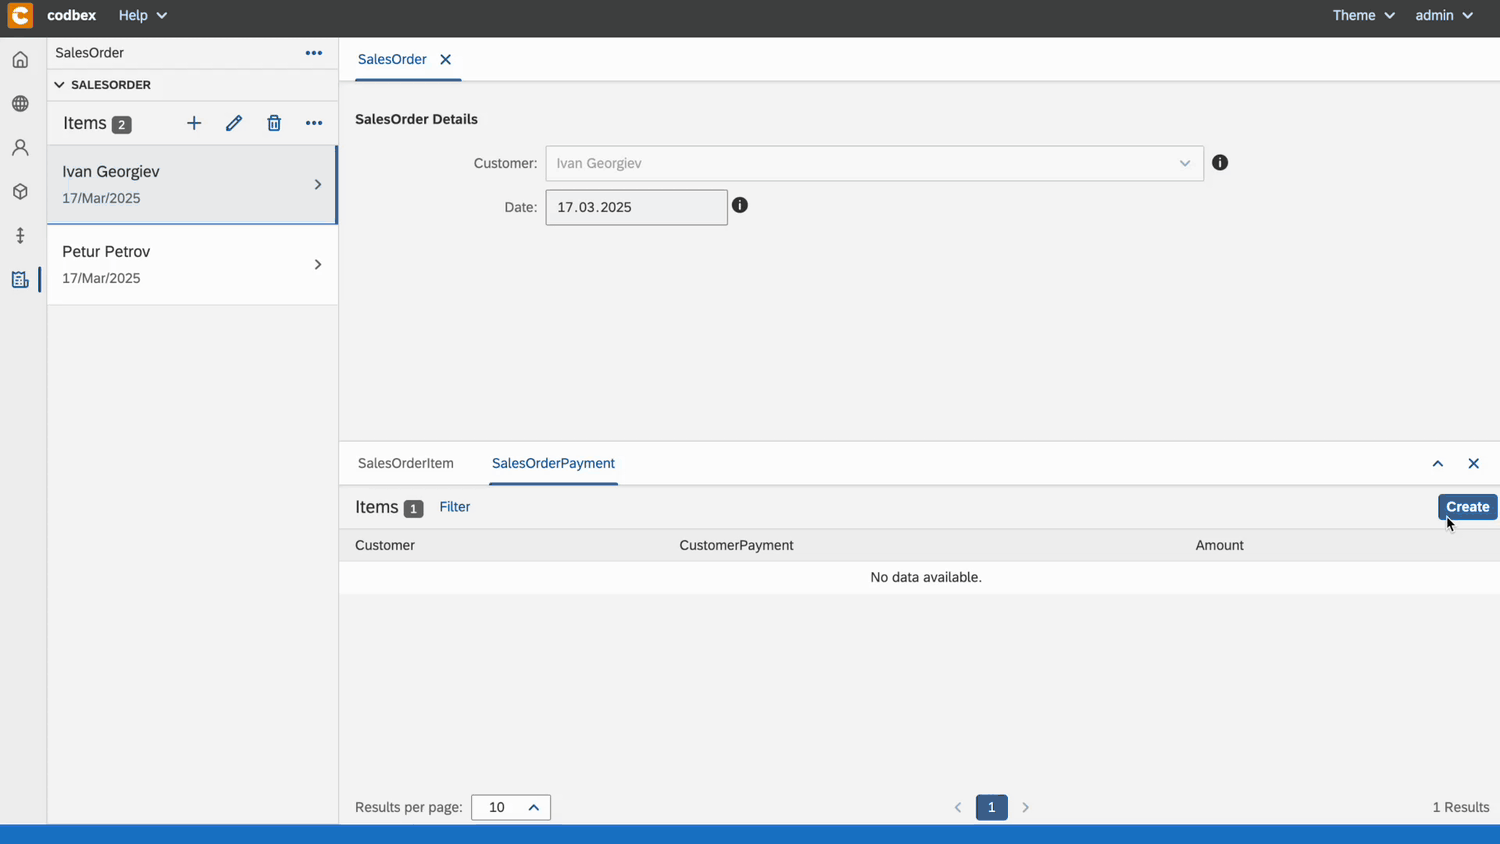
Case V - Customer-Payment - Showcase
Note: This configuration retrieves the Customer, and the CustomerPayment dropdown will then display only the CustomerPayments that belong to the chosen Customer.
Case VI - Payment-Amount
- Add decimal field for
Amount
Configuration:
In the Amount field set:
- Depends on Property:
CustomerPayment - Depends on Entity:
CustomerPayment - Value From:
Amount
Case VI - Payment-Amount - Showcase
Note: This configuration retrieves the CustomerPayment and automatically sets the Payment Amount.
With the last three configurations ensure that:
- We retrieve only the Customer from the Sales Orders.
- We include their respective Payments.
- We automatically set the Payment Amounts.
Final EDM
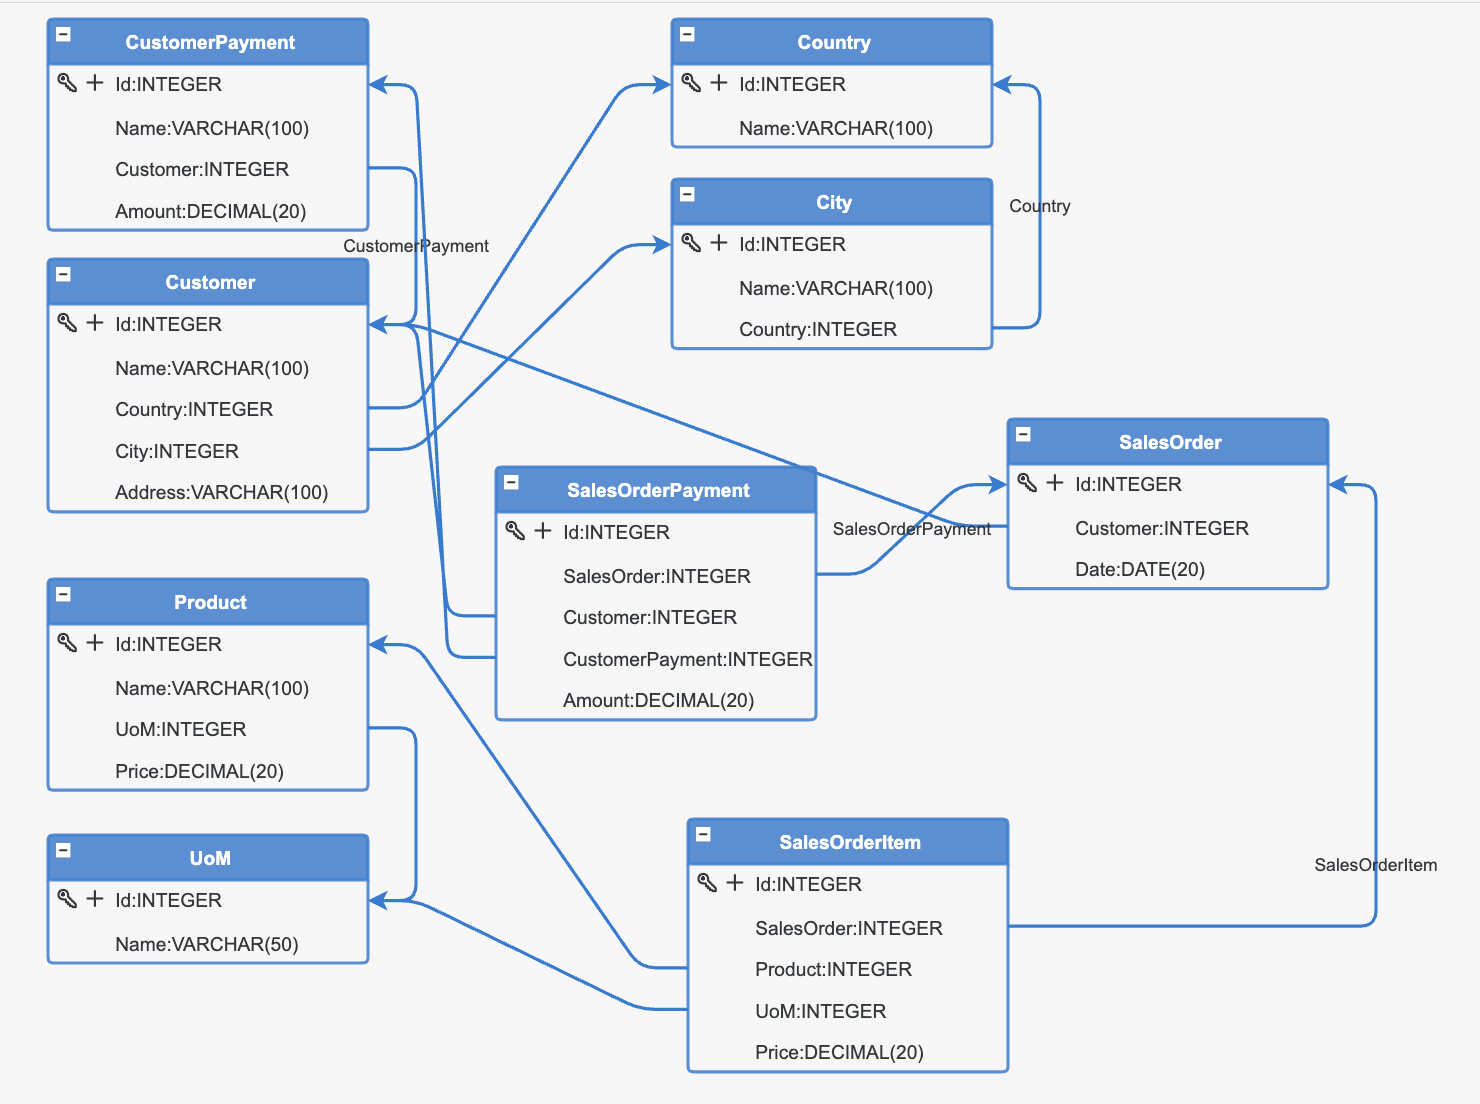
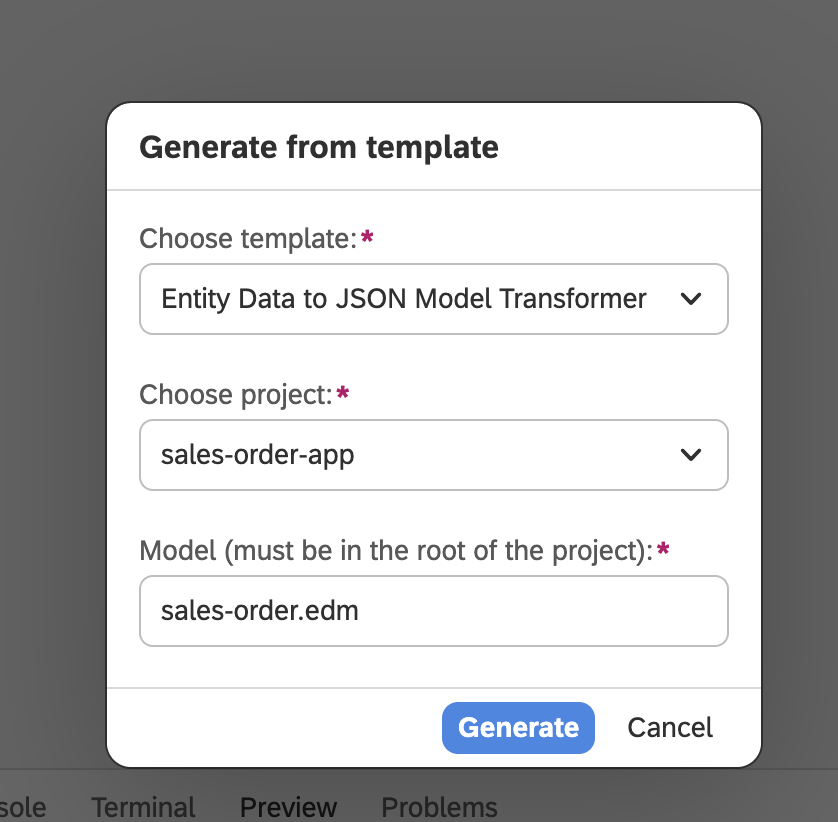
- Right-click on EDM file → Generate and choose Entity Data to JSON Transformer Model.
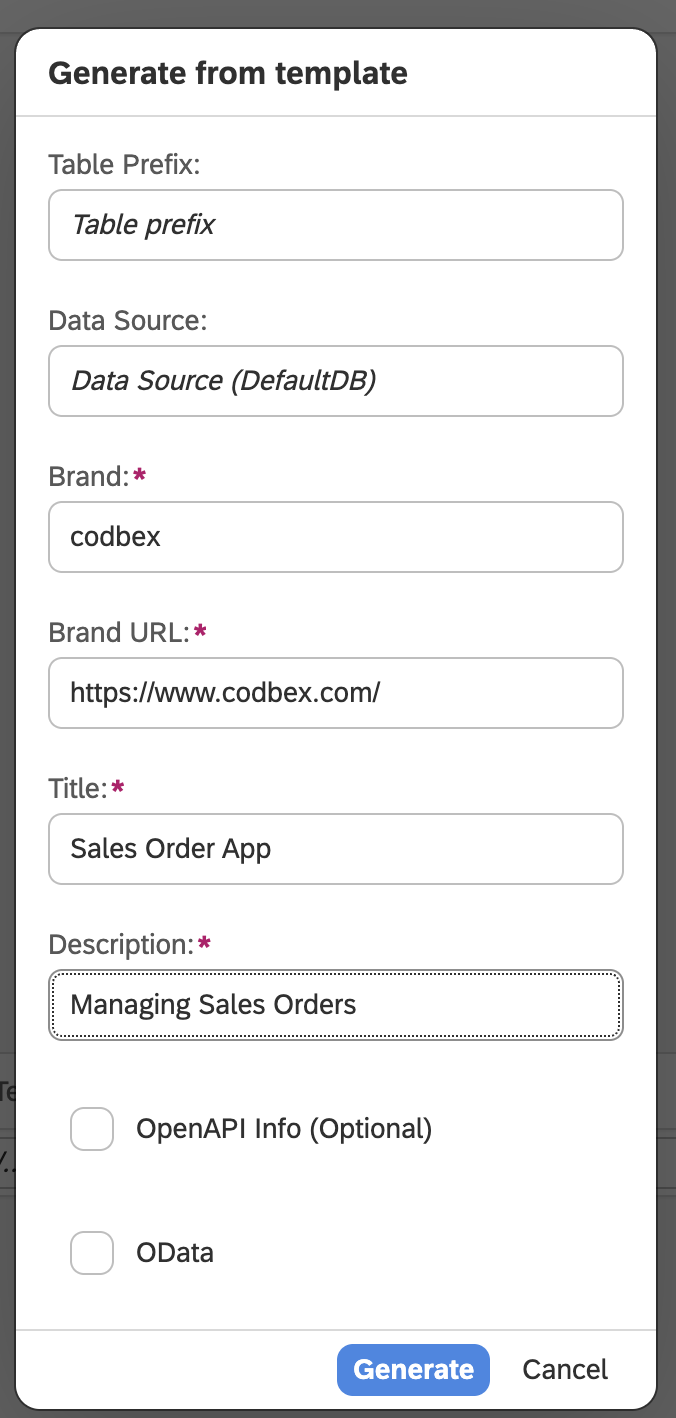
- Right-click on
.modelfile, choose Application - Full stack, fill fields in the next window with your details, and click Generate.
Conclusion
In this guide, we’ve shown how Rhea by codbex simplifies building a Sales Order App. With features like the "Depends On" functionality, businesses can easily create dynamic apps with minimal coding.
Case I- Country-City Dependency - represents the relation via the “Id” of the referred entity.Case II- Product-UoM - This case retrieves the field from another entity and automatically populates it in our entity.Case III- Product-Price - This case retrieves the field from another entity and automatically populates it in our entity.Case IV- Order-Customer - This case gets the selected entity and influences the other entity dropdown, which will adjust to show only the options associated with the chosen entity.Case V- Customer-Payment - represents the relation via the “Customer” of the referred entity.Case VI- Payment-Amount - This case retrieves the field from another entity and automatically populates it in our entity.
Ready to build your own? Click here to learn more or access the Sales Order App code. Rhea by codbex helps organizations turn complex visions into fully-functional apps quickly, without heavy technical expertise. The "Depends On" feature ensures seamless data flow between related entities, keeping your app consistent and efficient. For businesses looking to stay ahead, Rhea by codbex offers a flexible, cost-effective solution to build tailored applications and manage data with ease.