Deploy codbex products on Snowflake
Enhance your Snowflake environment with codbex's low-code solutions, effortlessly deployed as Docker images for maximum efficiency.
In this tutorial, I'm going to show you how you can easily deploy codbex products on Snowflake. I will describe the steps needed to deploy codbex Kronos. By following the steps, you can deploy any other codbex product in the same way.
Follow the steps below or watch the recorded video.
Snowflake setup
Create a non-trial Snowflake account
In a worksheet execute the following commands:
create a new role with privileges, warehouse and DB
sql// Create an CONTAINER_USER_ROLE with required privileges USE ROLE ACCOUNTADMIN; CREATE OR REPLACE ROLE CONTAINER_USER_ROLE; GRANT CREATE DATABASE ON ACCOUNT TO ROLE CONTAINER_USER_ROLE; GRANT CREATE WAREHOUSE ON ACCOUNT TO ROLE CONTAINER_USER_ROLE; GRANT CREATE COMPUTE POOL ON ACCOUNT TO ROLE CONTAINER_USER_ROLE; GRANT CREATE INTEGRATION ON ACCOUNT TO ROLE CONTAINER_USER_ROLE; GRANT MONITOR USAGE ON ACCOUNT TO ROLE CONTAINER_USER_ROLE; GRANT BIND SERVICE ENDPOINT ON ACCOUNT TO ROLE CONTAINER_USER_ROLE; GRANT IMPORTED PRIVILEGES ON DATABASE snowflake TO ROLE CONTAINER_USER_ROLE; // Grant CONTAINER_USER_ROLE to ACCOUNTADMIN grant role CONTAINER_USER_ROLE to role ACCOUNTADMIN; // Create Database, Warehouse, and Image spec stage USE ROLE CONTAINER_USER_ROLE; CREATE OR REPLACE DATABASE CONTAINER_HOL_DB; CREATE OR REPLACE WAREHOUSE CONTAINER_HOL_WH WAREHOUSE_SIZE = XSMALL AUTO_SUSPEND = 120 AUTO_RESUME = TRUE; CREATE STAGE IF NOT EXISTS specs ENCRYPTION = (TYPE='SNOWFLAKE_SSE'); CREATE STAGE IF NOT EXISTS volumes ENCRYPTION = (TYPE='SNOWFLAKE_SSE') DIRECTORY = (ENABLE = TRUE);Adjust the warehouse size if needed. Details about supported sizes here.
create compute pool and image repository
sqlUSE ROLE CONTAINER_USER_ROLE; CREATE COMPUTE POOL IF NOT EXISTS CONTAINER_HOL_POOL MIN_NODES = 1 MAX_NODES = 1 INSTANCE_FAMILY = CPU_X64_XS; CREATE IMAGE REPOSITORY IF NOT EXISTS CONTAINER_HOL_DB.PUBLIC.IMAGE_REPO; // get details about the created image repository SHOW IMAGE REPOSITORIES like 'IMAGE_REPO' IN SCHEMA CONTAINER_HOL_DB.PUBLIC;Adjust the size of the provisioned machines if needed. More details about the different sizes here.
create network rule which allows egress communication to all hosts on ports
443and80sqlUSE ROLE ACCOUNTADMIN; DROP NETWORK RULE IF EXISTS allow_all_rule; DROP EXTERNAL ACCESS INTEGRATION IF EXISTS allow_all_rule_integration; CREATE OR REPLACE NETWORK RULE allow_all_rule MODE= 'EGRESS' TYPE = 'HOST_PORT' VALUE_LIST = ('0.0.0.0:443','0.0.0.0:80'); CREATE OR REPLACE EXTERNAL ACCESS INTEGRATION allow_all_rule_integration ALLOWED_NETWORK_RULES = (allow_all_rule) ENABLED = true; GRANT USAGE ON INTEGRATION allow_all_rule_integration TO ROLE CONTAINER_USER_ROLE;This will allow codbex products to communicate with the outside world.
Docker image preparation
Pull latest codbex-kronos image
bashIMAGE_NAME='codbex-kronos' IMAGE_VERSION='latest' docker pull ghcr.io/codbex/$IMAGE_NAME:$IMAGE_VERSION --platform linux/amd64Adjust the
IMAGE_NAMEwith the needed codbex product. For example, you can usecodbex-helios,codbex-iapetus,codbex-hyperionand any other codbex product.Login in your Snowflake image repository
bash# replace <org> and <account> with values for your snowflake account SNOWFLAKE_REGISTRY_HOSTNAME='<org>-<account>.registry.snowflakecomputing.com' # example value: jiixfdf-qd67203.registry.snowflakecomputing.com docker login "$SNOWFLAKE_REGISTRY_HOSTNAME" -u <your_username>Retag the pulled image and push it to the Snowflake repository
- get your repository URL from
repository_urlof the following sql:
SHOW IMAGE REPOSITORIES like 'IMAGE_REPO' IN SCHEMA CONTAINER_HOL_DB.PUBLIC;
- retag the imagebash
# replace `<your-repo-url>` with your value, example:
# REPO_URL="jiixfdf-qd67203.registry.snowflakecomputing.com/container_hol_db/public/image_repo"
REPO_URL="<your-repo-url>"
SNOWFLAKE_IMAGE="$REPO_URL/$IMAGE_NAME:$IMAGE_VERSION"

docker tag ghcr.io/codbex/$IMAGE_NAME:$IMAGE_VERSION "$SNOWFLAKE_IMAGE"

echo "Pushing image $SNOWFLAKE_IMAGE"
docker push "$SNOWFLAKE_IMAGE"
Deploy the application
Create spec file
codbex-kronos-snowpark.yamlfor service deployment with the following contentyamlspec: containers: - name: codbex-application image: <snowflake-image> # volumeMounts: # - name: app-volume # mountPath: /target env: DIRIGIBLE_DATABASE_CUSTOM_DATASOURCES: SNOWFLAKE DIRIGIBLE_DATABASE_DATASOURCE_NAME_DEFAULT: SNOWFLAKE SNOWFLAKE_DRIVER: net.snowflake.client.jdbc.SnowflakeDriver SNOWFLAKE_WAREHOUSE: CONTAINER_HOL_WH SNOWFLAKE_DATABASE: CONTAINER_HOL_DB SNOWFLAKE_ROLE: CONTAINER_USER_ROLE SNOWFLAKE_SCHEMA: PUBLIC SNOWFLAKE_URL: jdbc:snowflake://not-used-in-snowpark-scenario SNOWFLAKE_USERNAME: not-used-in-snowpark-scenario SNOWFLAKE_PASSWORD: not-used-in-snowpark-scenario endpoints: - name: app-endpoint port: 80 public: true # volumes: # - name: app-volume # source: "@CONTAINER_HOL_DB.PUBLIC.VOLUMES" # uid: 0 # gid: 0Uncomment
volumesandvolumeMountssections if you need persistent repository and SystemDB.
Details about the Snowpark Container Services specification YAML could be found here.Replace the following placeholders in the above yaml
Placeholder Description Example <snowflake-image>snowflake image - the value of SNOWFLAKE_IMAGE jiixfdf-qd67203.registry.snowflakecomputing.com/container_hol_db/public/image_repo/codbex-kronos:latestUpload the spec file
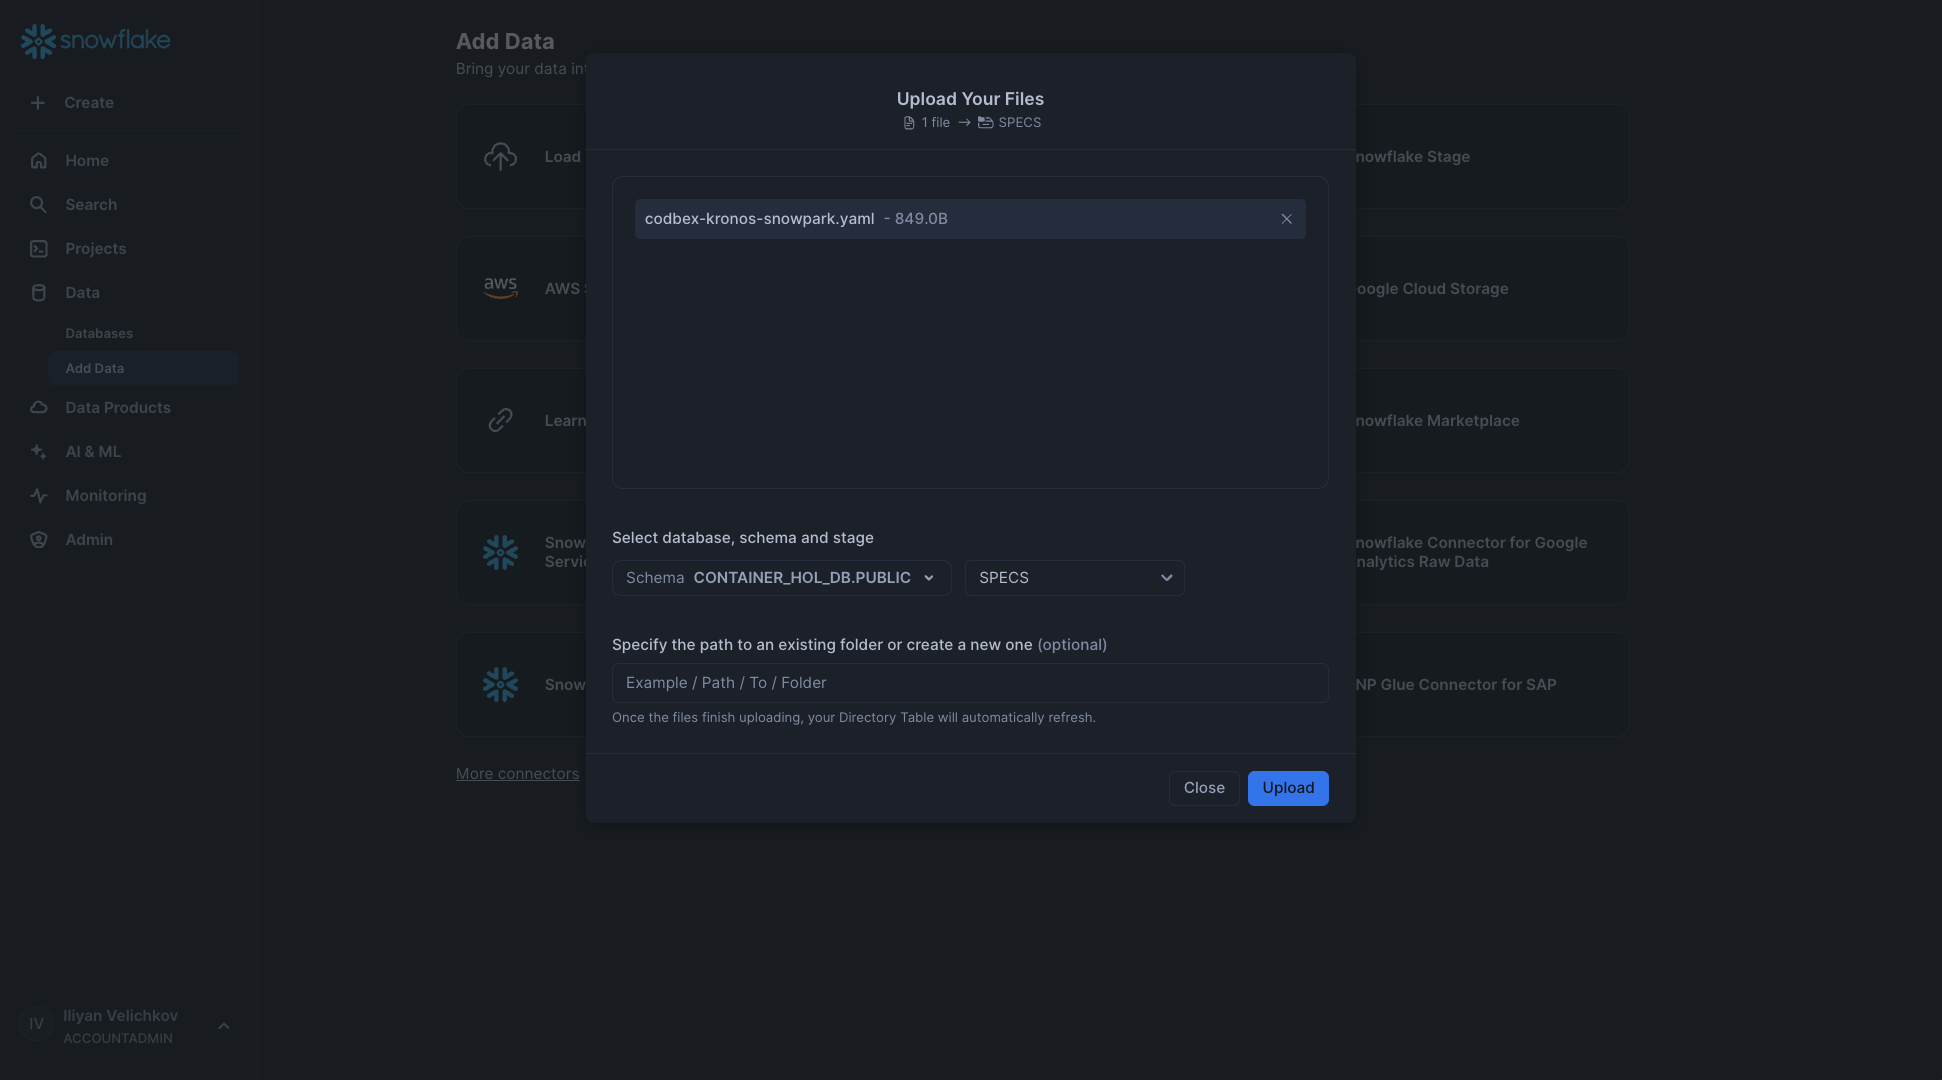
Upload the file to the created stage
specsusing the UI (Snowsight)- go to Snowsight UI
- open
Data->Add Data - select
Load files into a Stage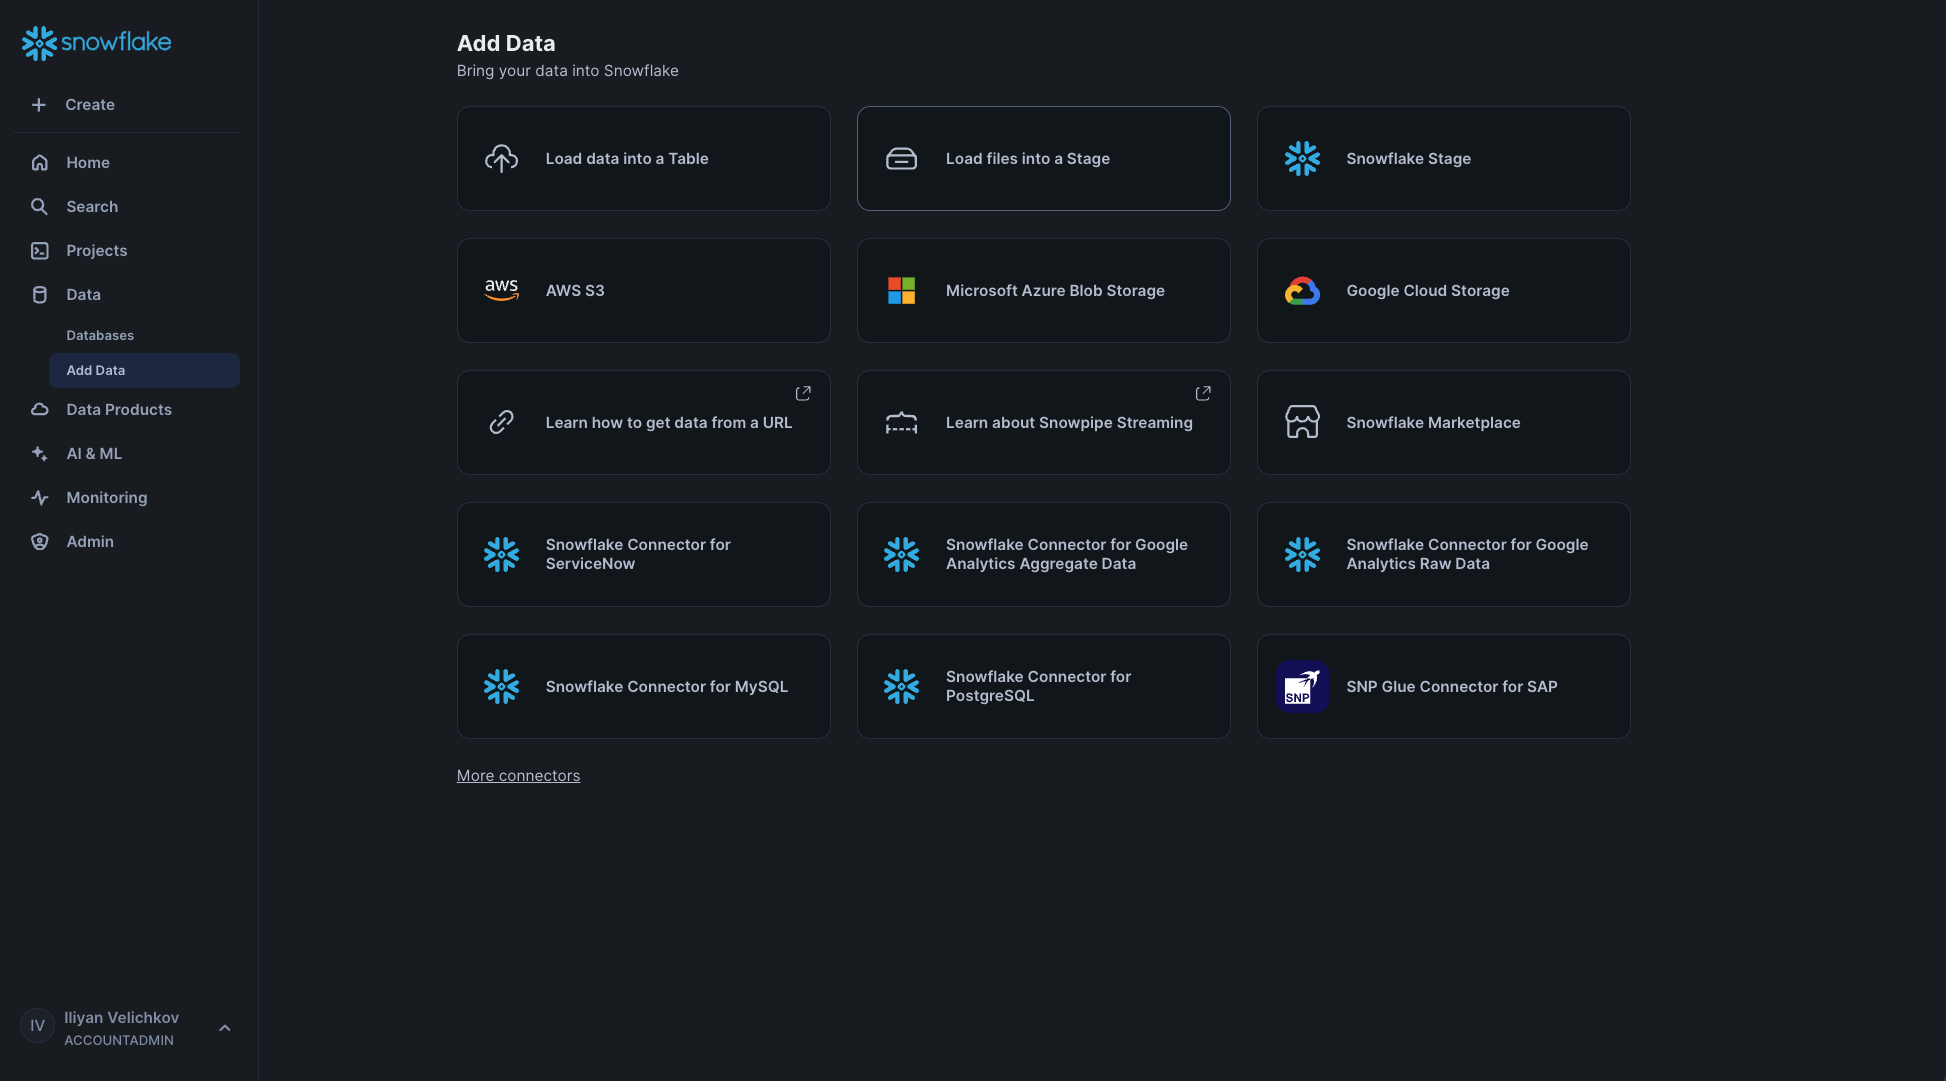
- select database
CONTAINER_HOL_DBand schemaPUBLIC - select stage
specs - click on
Uploadbutton
- Here you ca find more details about the user interface if you have any troubles.
Alternatively, you can use the Snowflake CLI
install Snowflake CLI by following the instructions here
create a new connection with name
blogand setrole=CONTAINER_USER_ROLE,warehouse=CONTAINER_HOL_WH,database=CONTAINER_HOL_DB,schema=PUBLICbashsnow connection add --defaulttest created connection
bashsnow connection test --connection "blog"upload the created spec YAML file
bashsnow stage copy codbex-kronos-snowpark.yaml @specs \ --overwrite --connection blog \ --database CONTAINER_HOL_DB --schema PUBLIC --role CONTAINER_USER_ROLE
Create (deploy) the application service
in a Snowflake worksheet execute the following command:
sqlUSE ROLE CONTAINER_USER_ROLE; USE DATABASE CONTAINER_HOL_DB; DROP SERVICE IF EXISTS codbex_kronos; CREATE SERVICE codbex_kronos in compute pool CONTAINER_HOL_POOL from @specs EXTERNAL_ACCESS_INTEGRATIONS = (allow_all_rule_integration) spec = 'codbex-kronos-snowpark.yaml';check your service status:
sqlCALL SYSTEM$GET_SERVICE_STATUS('codbex_kronos');at first, it will be in status
PENDING
wait until it become
READY


Using your newly deployed application
Get application URL
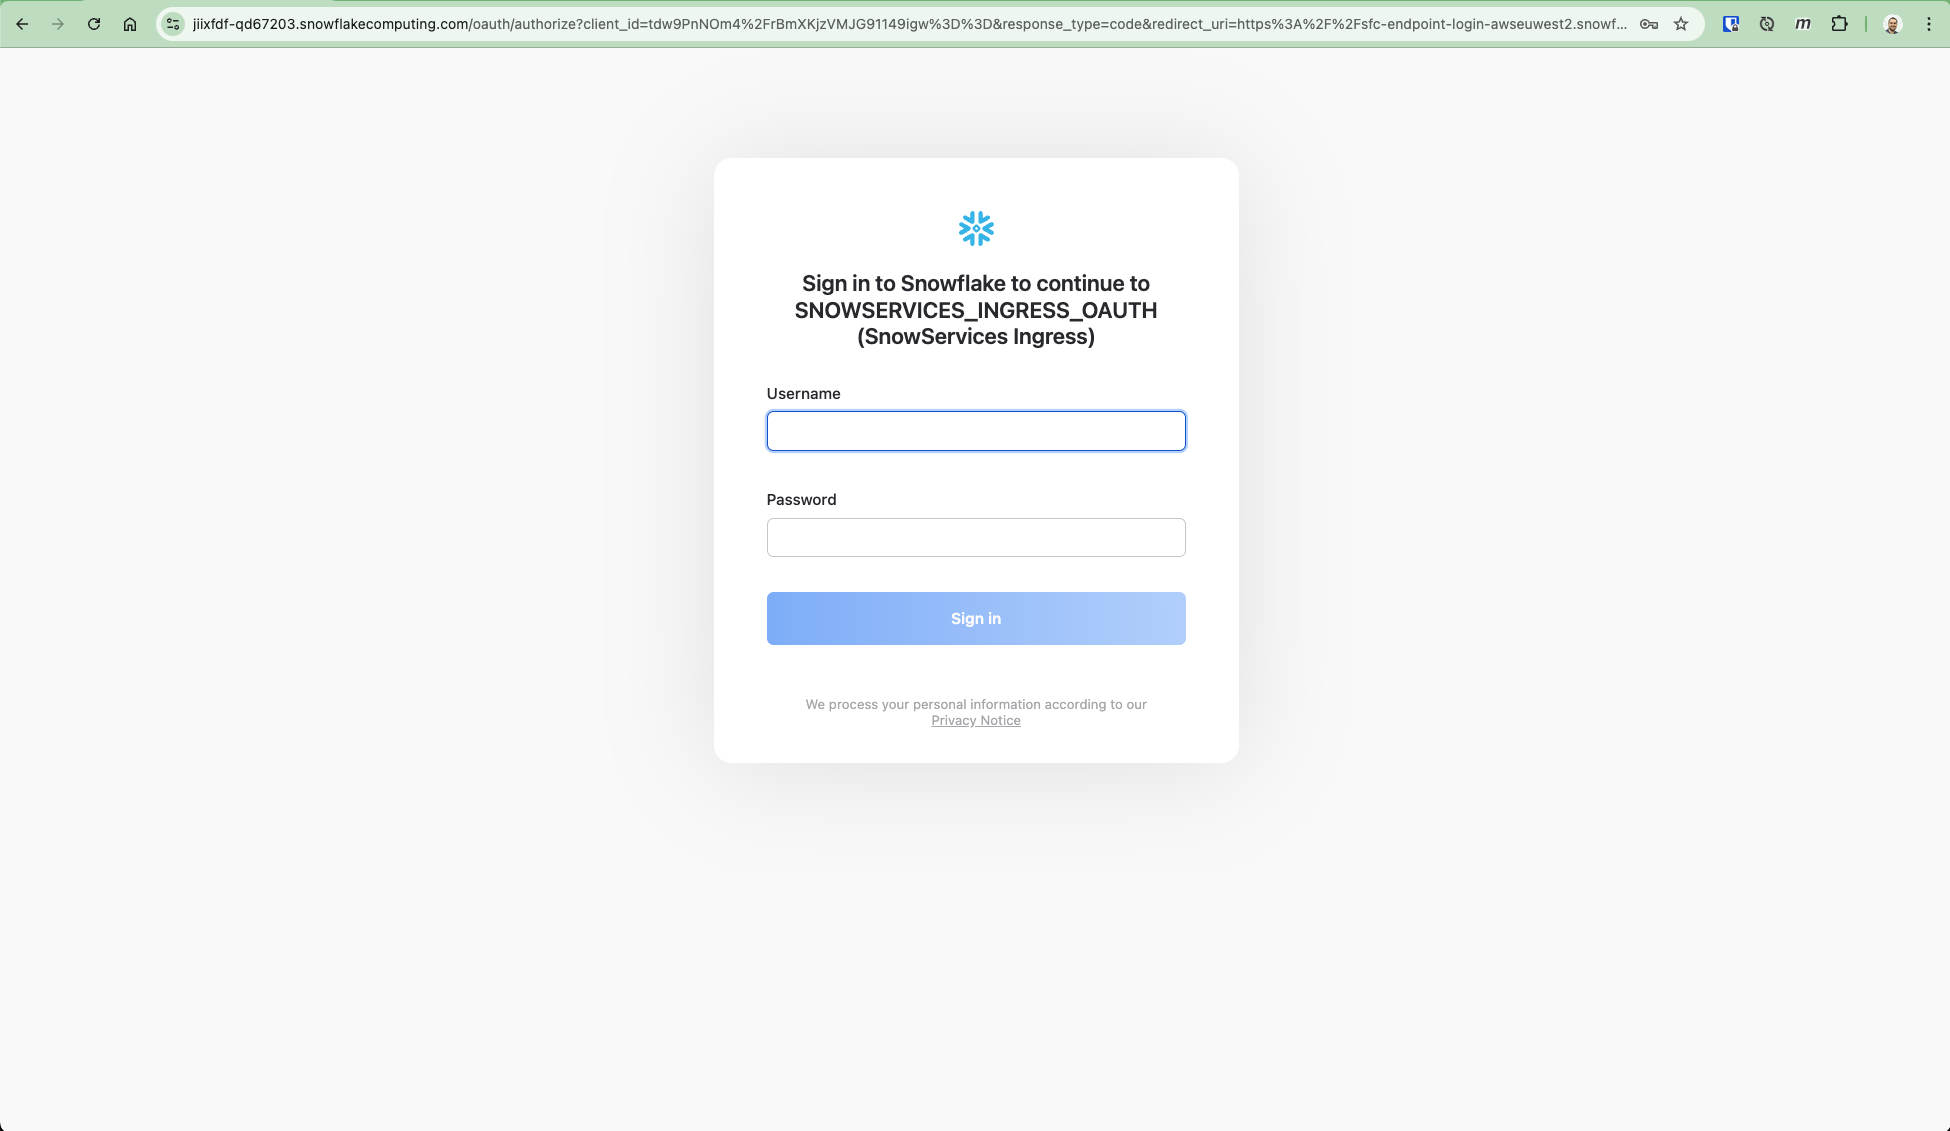
sqlSHOW ENDPOINTS IN SERVICE codbex_kronos;Open the value of
ingress_urlin your browser
Login with your Snowflake credentials
Login in the application using the default credentials user
adminand passwordadmin.
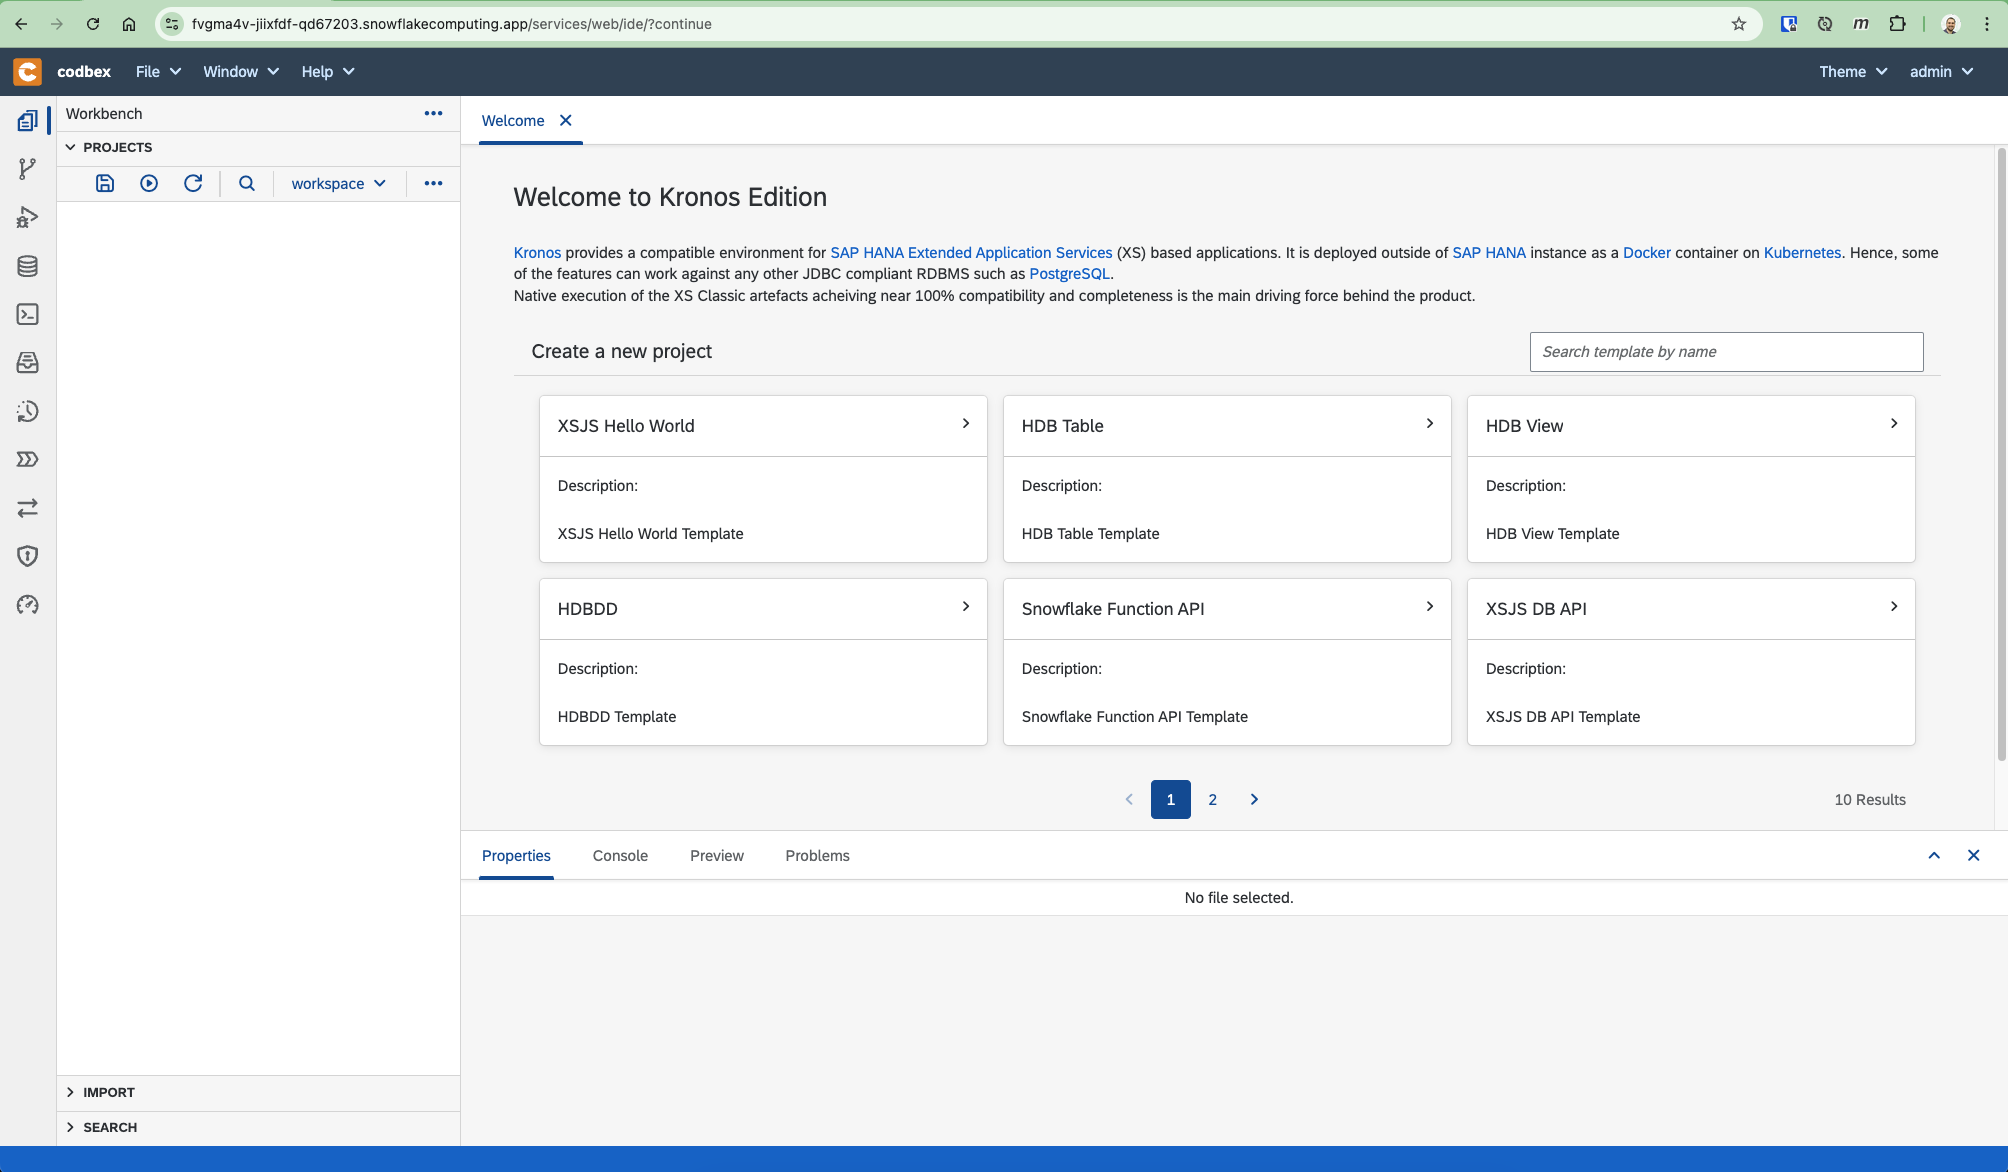
You should see the application's welcome page
Next, you can validate the connection to the Snowflake database
- go to
Databaseperspective by clicking on the corresponding button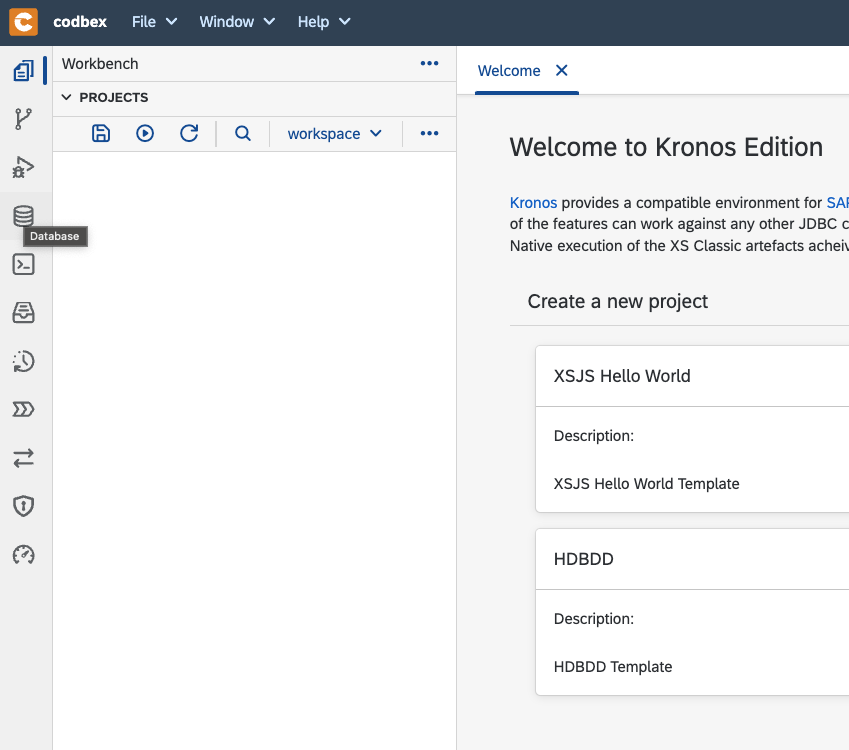
- select
SNOWFLAKEdatasource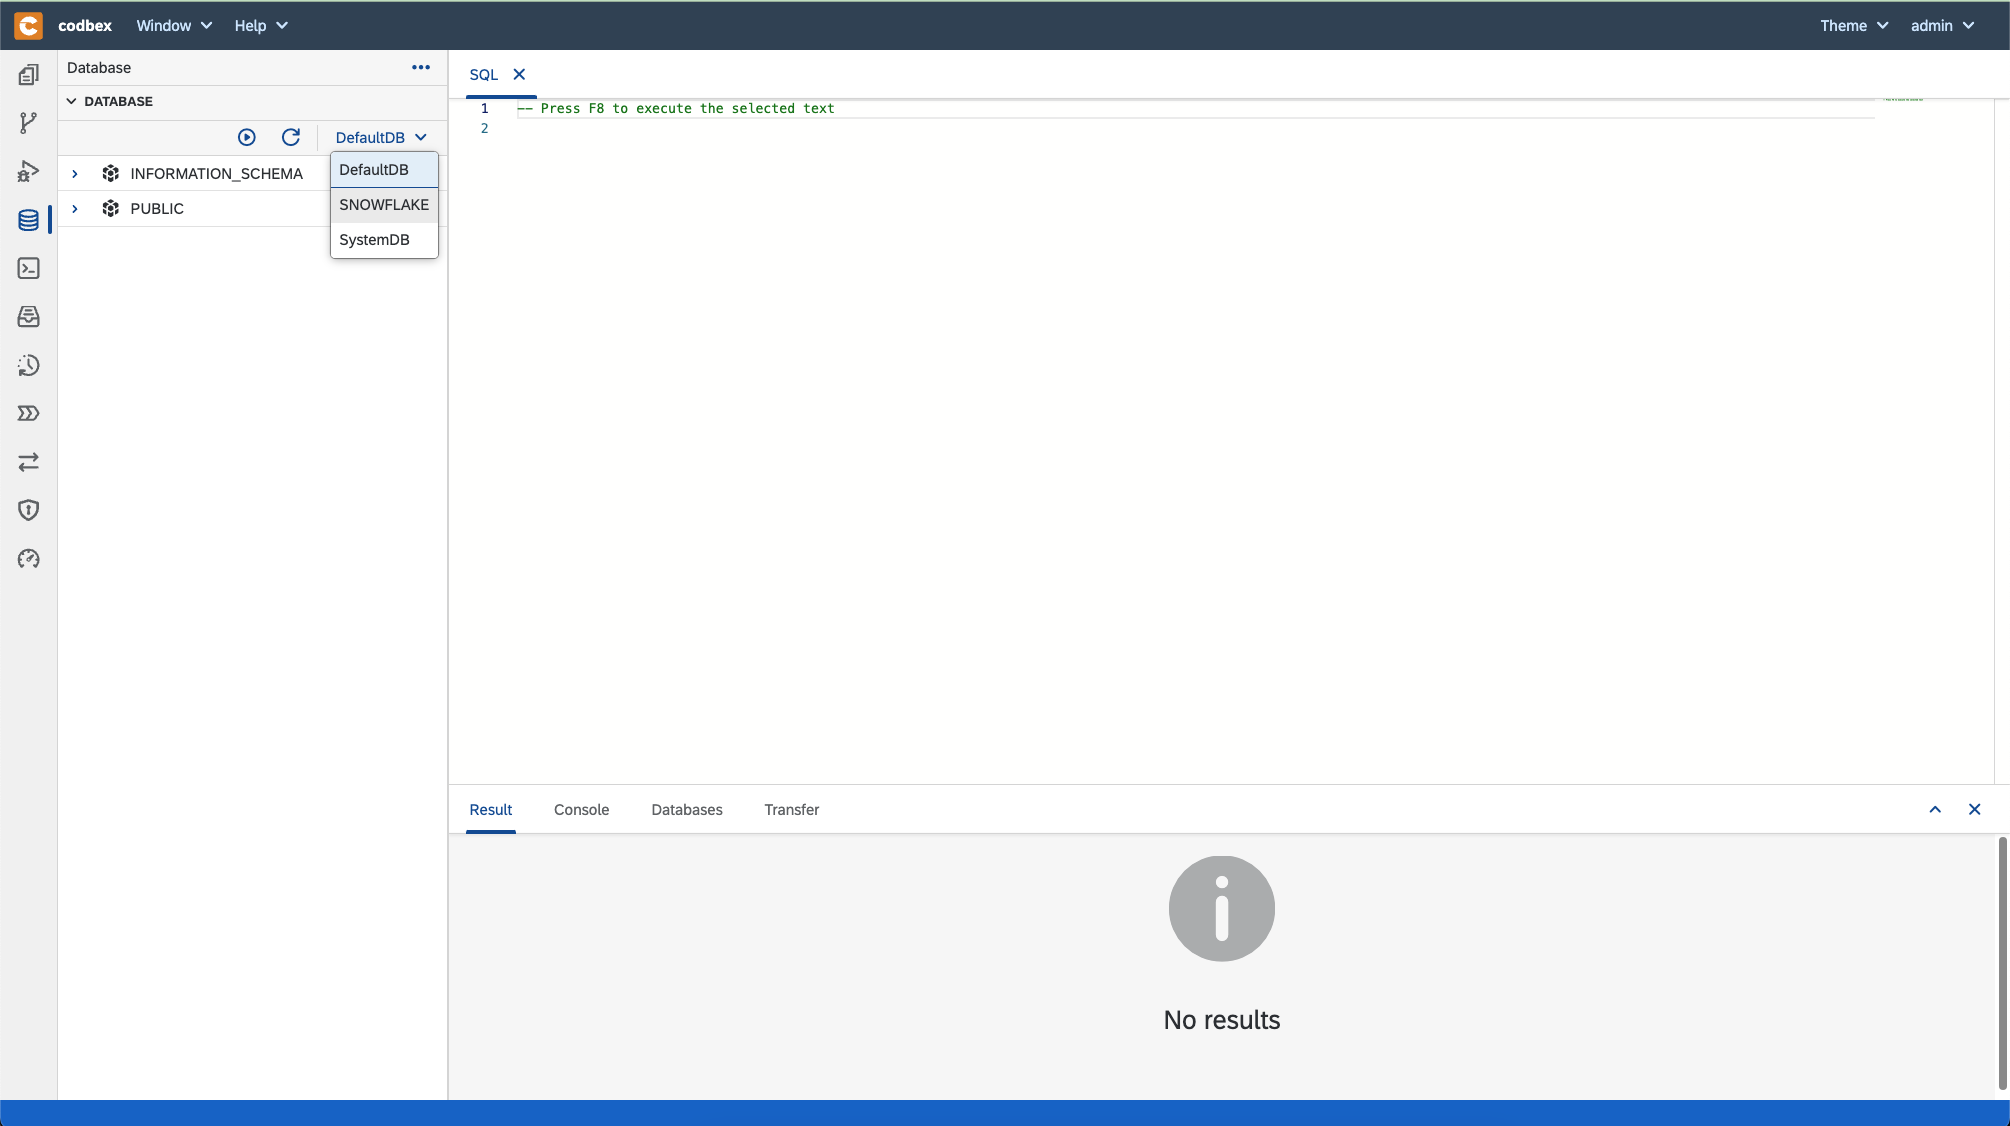
- create a test table, insert data into it and select all entriessql
DROP TABLE IF EXISTS STUDENTS;

CREATE TABLE STUDENTS (
    ID INTEGER AUTOINCREMENT,
    FIRST_NAME STRING,
    LAST_NAME STRING
);

INSERT INTO STUDENTS (FIRST_NAME, LAST_NAME)
VALUES
     ('John', 'Doe'),
     ('Jane', 'Smith'),
     ('Emily', 'Johnson');

SELECT * FROM STUDENTS;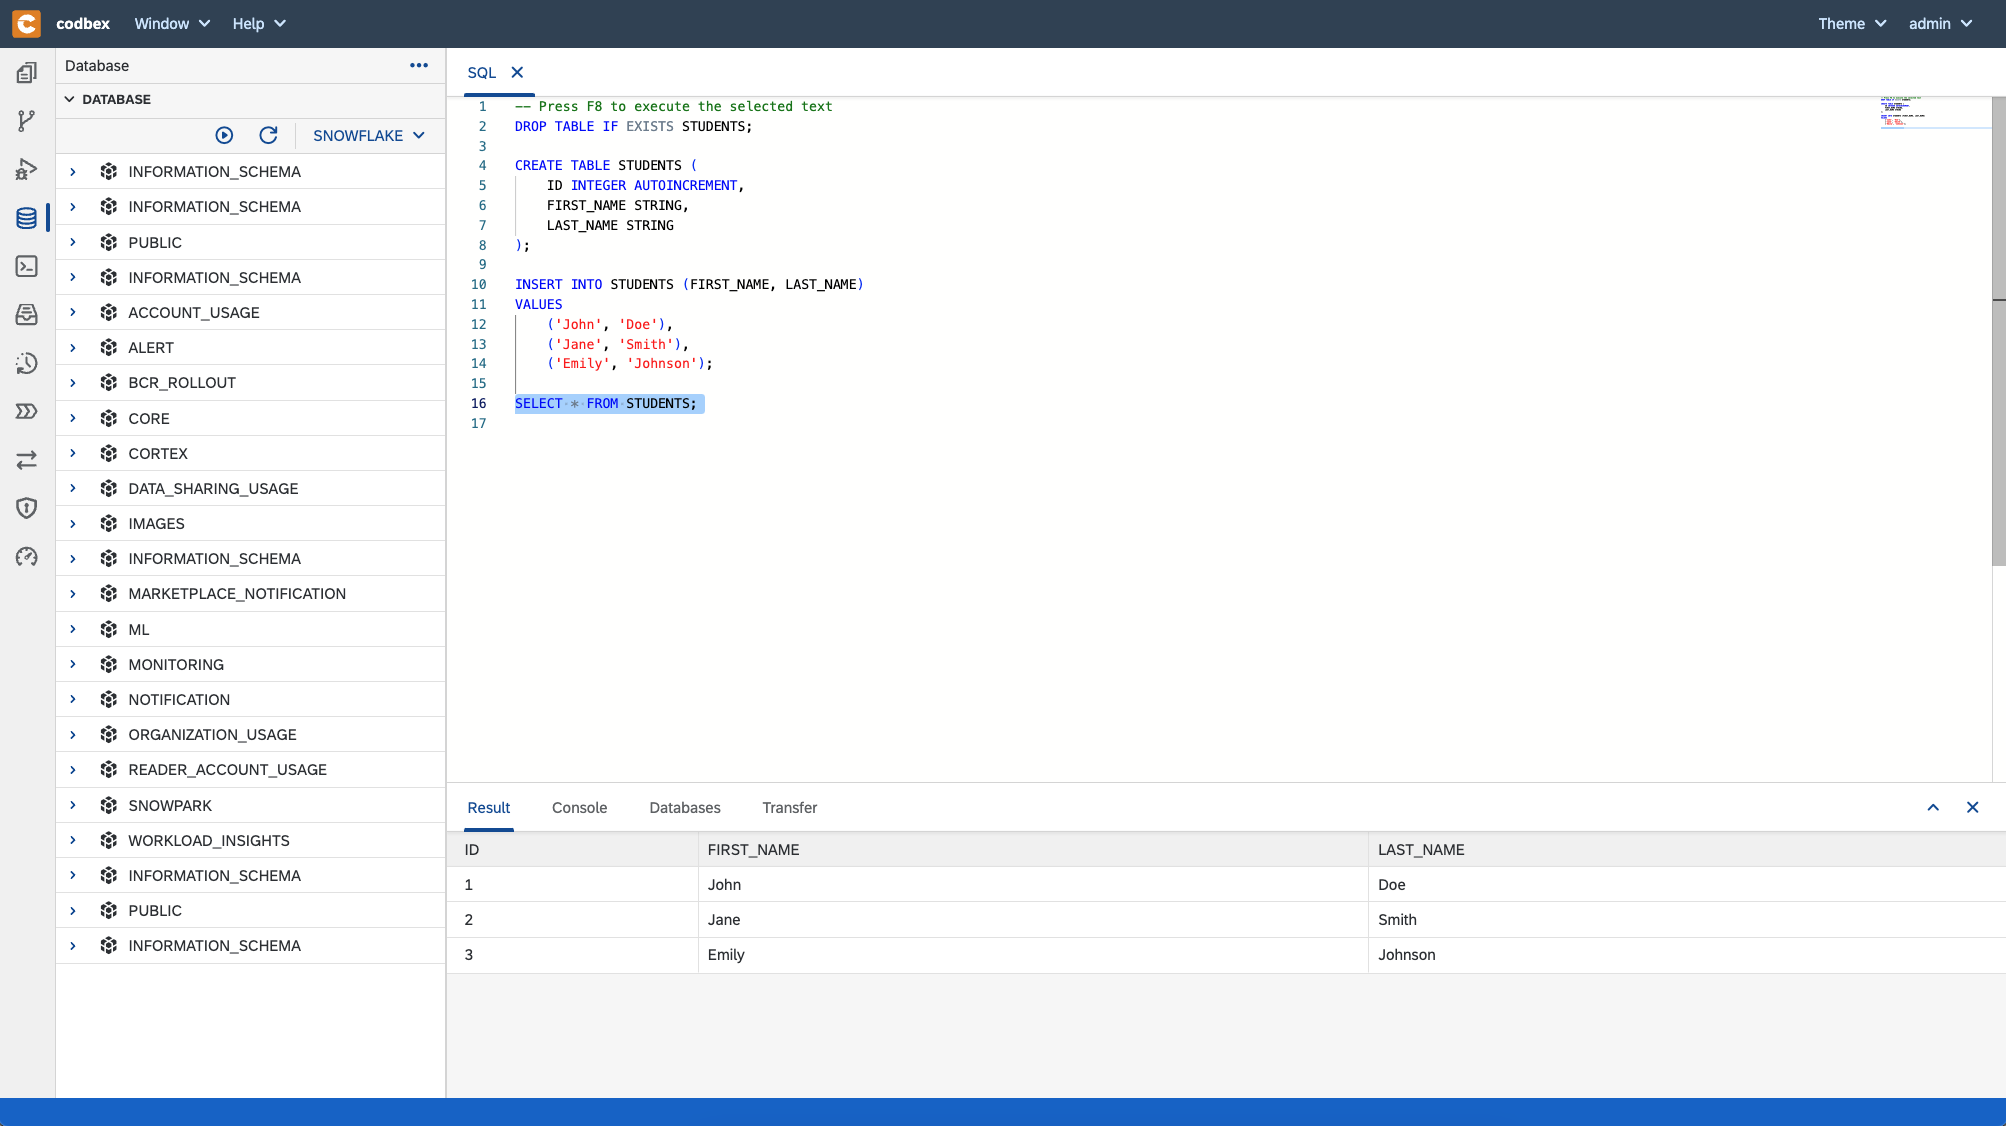
- go to
To check the application logs, you can call SYSTEM$GET_SERVICE_LOGS function


CALL SYSTEM$GET_SERVICE_LOGS('codbex_kronos', '0', 'codbex-application');Congratulations, you have deployed your codbex application!
I hope you enjoyed this blog. Stay tuned for more great functionality by codbex!
If you have any questions, ideas or want to contribute, feel free to contact us.